Kluctl Webui
Kluctl Webui documentation.
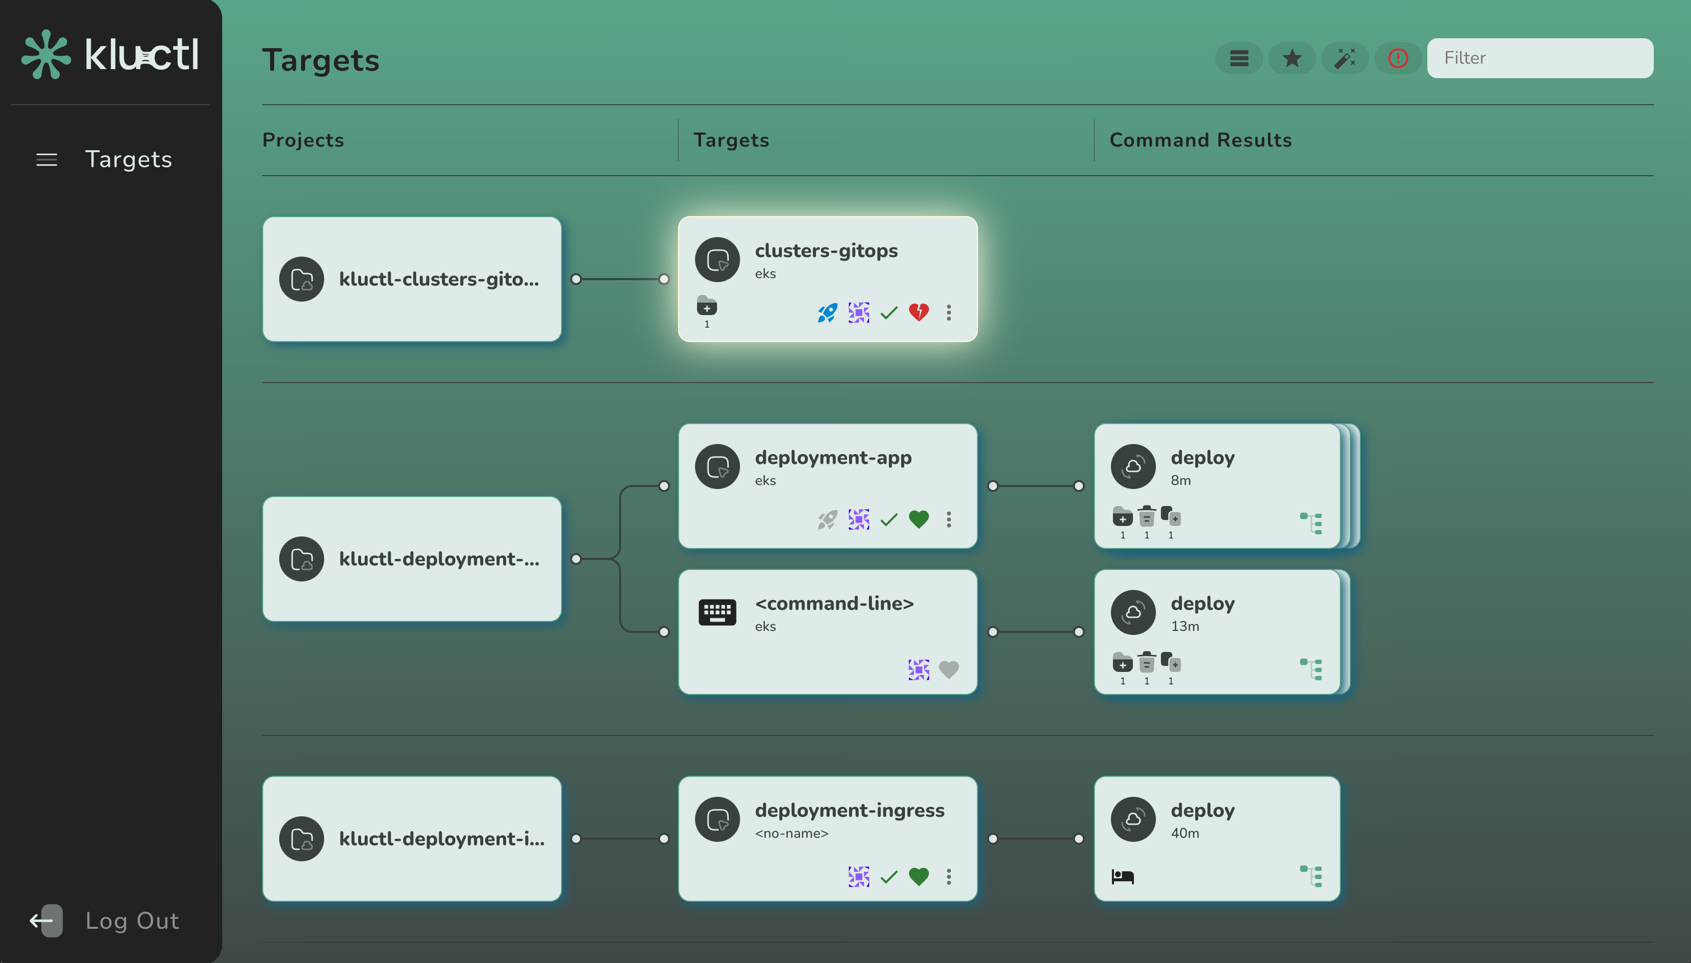
The Kluctl Webui is a powerful UI which allows you to monitor and control your Kluctl GitOps deployments.
You can run it locally or install it to your Kubernetes cluster.
State of the Webui
Please note that the Kluctl Webui is still in early stage of development, missing many planned features. It might
also contain bugs and be unstable in some situations. If you encounter any such problems, please report these
to https://github.com/kluctl/kluctl/issues.
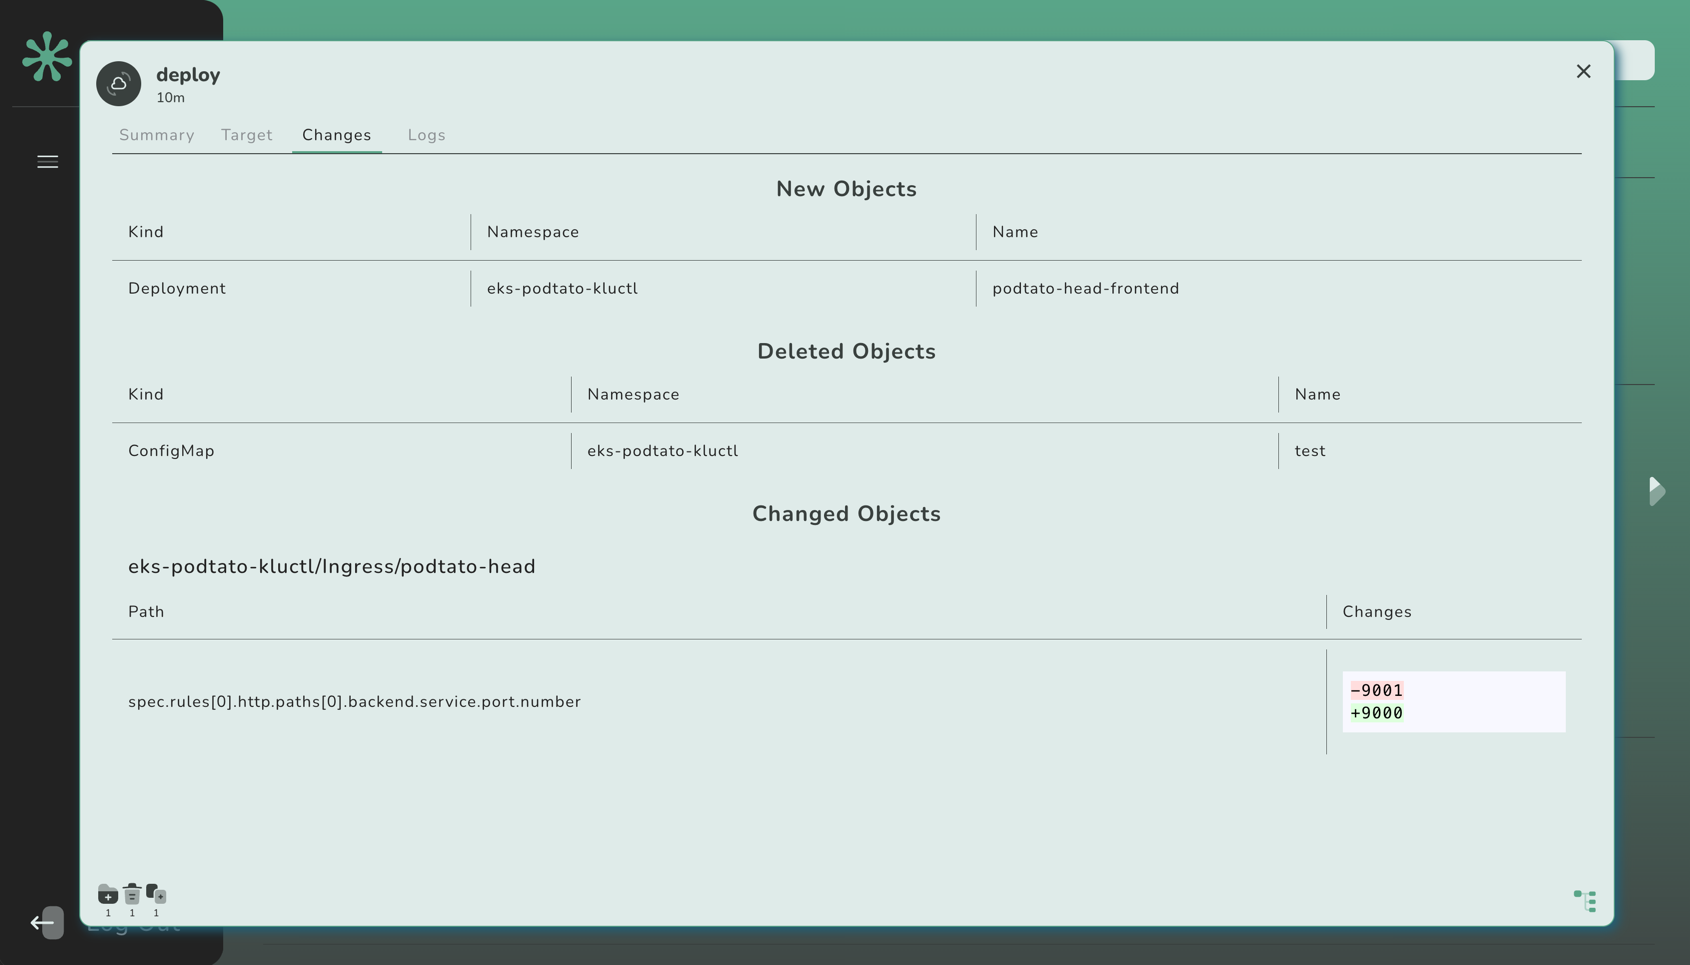
Screenshots
Targets Overview
Command Result
1 - Installation
Installing the Kluctl Webui
The Kluctl Webui can be installed by using a Git Include that refers
to the webui deployment project. Example:
deployments:
  - git:
      url: https://github.com/kluctl/kluctl.git
      subDir: install/webui
      ref:
        tag: v2.27.0
Login
Static Users
By default, the Webui will automatically generate an static credentials for an admin and for a viewer user. These
credentials can be extracted from the kluctl-system/webui-secret Secret after the Webui has started up for the first
time. To get the admin password, invoke:
$ kubectl -n kluctl-system get secret webui-secret -o jsonpath='{.data.admin-password}' | base64 -d
For the viewer password, invoke:
$ kubectl -n kluctl-system get secret webui-secret -o jsonpath='{.data.viewer-password}' | base64 -d
If you do not want to rely on the Webui to generate those secrets, simply use your typical means of creating/updating
the webui-secret Secret. The secret must contain values for admin-password, viewer-password.
OIDC Integration
The Webui offers an OIDC integration, which can be configured via CLI arguments.
For an example of an OIDC provider configurations, see Azure AD Integration.
Customization
Serving under a different path
By default, the webui is served under the /path. To change the path, pass the --prefix-path argument to the webui:
deployments:
  - git:
      url: https://github.com/kluctl/kluctl.git
      subDir: install/webui
      ref:
        tag: v2.27.0
    vars:
      - values:
          webui_args:
            - --path-prefix=/my-custom-prefix
Overriding the version
The image version of the Webui can be overriden with the kluctl_version arg:
deployments:
  - git:
      url: https://github.com/kluctl/kluctl.git
      subDir: install/webui
      ref:
        tag: main
    vars:
      - values:
          args:
            kluctl_version: v2.27.0
Passing arguments
You can pass arbitrary command line arguments to the webui by providing the webui_args arg:
deployments:
  - git:
      url: https://github.com/kluctl/kluctl.git
      subDir: install/webui
      ref:
        tag: v2.27.0
    vars:
      - values:
          webui_args:
            - --gops-agent
2 - Running locally
Running the Kluctl Webui locally
The Kluctl Webui can be run locally by simply invoking kluctl webui run.
It will by default connect to your local Kubeconfig Context and expose the Webui on localhost. It will also open
the browser for you.
Multiple Clusters
The Webui can already handle multiple clusters. Simply pass --context <context-name> multiple times to kluctl webui run.
This will cause the Webui to listen for status updates on all passed clusters.
As noted in State of the Webui, the Webui is still in early stage and thus currently
lacks sorting and filtering for clusters. This will be implemented in future releases.
3 - Azure AD Integration
Azure AD Integration
Azure AD can be integrated via the OIDC integration.
Add a new Azure AD App registration
- From the
Azure Active Directory > App registrations menu, choose + New registration - Enter a
Name for the application (e.g. Kluctl Webui). - Specify who can use the application (e.g.
Accounts in this organizational directory only). - Enter Redirect URI (optional) as follows (replacing
my-kluctl-webui-url with your Kluctl Webui URL), then choose Add.- Platform:
Web - Redirect URI: https://
<my-kluctl-webui-url>/auth/callback
- When registration finishes, the Azure portal displays the app registration’s Overview pane. You see the Application (client) ID.

Add credentials a new Azure AD App registration
- From the
Certificates & secrets menu, choose + New client secret - Enter a
Name for the secret (e.g. Kluctl Webui SSO).- Make sure to copy and save generated value. This is a value for the
oidc-client-secret.

Setup permissions for Azure AD Application
- From the
API permissions menu, choose + Add a permission - Find
User.Read permission (under Microsoft Graph) and grant it to the created application:

- From the
Token Configuration menu, choose + Add groups claim

Associate an Azure AD group to your Azure AD App registration
- From the
Azure Active Directory > Enterprise applications menu, search the App that you created (e.g. Kluctl Webui).- An Enterprise application with the same name of the Azure AD App registration is created when you add a new Azure AD App registration.
- From the
Users and groups menu of the app, add any users or groups requiring access to the service.

Use the following configuration when installing the Webui. Replace occurrences of
<directory_tenant_id>, <client_id>, <my-kluctl-webui-url> and <admin_group_id> with the appropriate values from
above.
deployments:
  - path: secrets
  - git:
      url: https://github.com/kluctl/kluctl.git
      subDir: install/webui
      ref:
         tag: v2.27.0
    vars:
      - values:
          args:
            webui_args:
              - --auth-oidc-issuer-url=https://login.microsoftonline.com/<directory_tenant_id>/v2.0
              - --auth-oidc-client-id=<client_id>
              - --auth-oidc-scope=openid
              - --auth-oidc-scope=profile
              - --auth-oidc-scope=email
              - --auth-oidc-redirect-url=https://<my-kluctl-webui-url>/auth/callback
              - --auth-oidc-group-claim=groups
              - --auth-oidc-admins-group=<admin_group_id>
Also, add webui-secrets.yaml inside the secrets subdirectory:
apiVersion: v1
kind: Secret
metadata:
  name: webui-secret
  namespace: kluctl-system
stringData:
  oidc-client-secret: "<client_secret>"
Please note that the client secret is sensitive data and should not be added unencrypted to you git repository.
Consider encrypting it via SOPS.