This is the multi-page printable view of this section. Click here to print.
Kluctl Blog
- ArgoCD/Flux vs Kluctl
- Managing Cluster API with Kluctl
- Introducing the Kluctl Webui
- Managing many Helm Charts with Kluctl
- Introducing the Template Controller and building GitOps Preview Environments
- Templating in Kustomize with Kluctl style deploy and diff
- Multiple Environments with Flux and Kluctl
- Rethinking Kubernetes Configuration Management
- Kluctl and Flux
ArgoCD/Flux vs Kluctl
Kluctl is very flexible when it comes to deployment strategies. All features implemented by Kluctl can be used via the CLI or via the Kluctl Controller.
This makes Kluctl comparable to ArgoCD and Flux, as these projects also implement the GitOps strategy.
This comparison assumes that you already know Flux and/or ArgoCD to some degree, or at least have heard of them, so it will not go too deep into comparing these against each other. If you want a deep dive into ArgoCD vs Flux, read the Comparison: Flux vs Argo CD blog post from Earthly. Please note however, that this post is not fully up-to-date anymore, for example in regard to Flux’s Helm drift detection features.
This post is meant to be updated over its lifetime when things change in any of the projects. Feel free to use the comment feature or create an issue or pull request to notify us about things that need to be changed.
Use of Custom Resources
Kubernetes Custom Resources (CRs) are used to extend the Kubernetes API with custom resources and custom behavior. CustomResourceDefinitions define the new API types while Custom Resources (e.g. a Kustomization, HelmRelease or Application) represent single instances of these new types. A controller watches for changes of a certain type and acts accordingly, e.g. by applying the desired state to the cluster to move the actual state closer to the desired state (reconciliation).
ArgoCD and Flux
Both, ArgoCD and Flux heavily use and depend on CRs and Controllers to implement reconciliation and deployments. To
implement more complex deployments, you usually have to use multiple Custom Resources together. Sometimes you have to even chain them (e.g.
Kustomization -> Kustomization -> HelmRelease). Please note that each Kustomization (the CRs) in this chain also might
imply a kustomization.yaml that can also use overlays and components which might lead to even longer chains of CRs. A
HelmRelease could potentially also deploy Kustomizations or other HelmReleases, when dynamic configuration via templating
is desired.
Following and fully understanding these chains can become quite challenging, when the project size and complexity grows.
Another implication of using chained CRs is that your deployments become 100% dependent on the controllers running inside Kubernetes, because in-cluster reconciliation is the only way to process the full chain of CRs. This means, you can not fully test or verify your deployments before pushing them to your Git repository. The only way to reliably prevent killing your production environment is to introduce testing/staging environments, adding even more complexity to your deployments and processes.
ArgoCD and Flux both offer diff commands via the CLI that allow you to run a dry-run apply + diff for a single CR, these do however not follow potential chains of CRs.
Kluctl
Kluctl also uses CRs (KluctlDeployment, but only as a bridge between Kluctl deployment projects and GitOps. The actual project structure is solely defined via the Kluctl project and deployment YAML files found inside your Git repository. The KluctlDeployment CR does not add anything special to the deployment project itself, meaning that you never get dependent on in-cluster reconciliation.
This means, to deploy your project, you can always revert back to using the Kluctl CLI even if you leverage GitOps as your main deployment strategy. This might sound counterintuitive at first when talking about GitOps, but there are actually very good reasons and use cases why you might consider mixing GitOps with other strategies. Please read the next chapter for more details on this.
Pull vs. Push
GitOps can be implemented in two different strategies. One is the push strategy, which is actually what has been done reliably for years in classical continuous delivery, e.g. via Jenkins, Gitlab pipelines or GitHub workflows. The way it is usually implemented however has some disadvantages, for example the possibility of a growing drift between the state in Git and the state in the cluster.
The other is the pull strategy, implemented via controllers running inside your target cluster. These controllers usually pull the Git repository in some defined interval and then (re-)apply all resources continuously. This reliably ensures that drift is being fixed whenever it occurs.
ArgoCD and Flux
Both implement GitOps as a pull strategy. ArgoCD also natively supports manual synchronization, meaning that you can disable periodic reconciliation and instead rely on manual syncs via the UI. Flux allows to manually suspend and resume reconciliation via the CLI, allowing you to get some control over the timing of reconciliations.
Push based GitOps is not possible in ArgoCD or Flux, this is however not considered a downside but a strict design choice. At the same time, it would be very hard to implement due the strict reliance on Custom Resources for core features.
Kluctl
Kluctl allows you to choose between the push and the pull-based strategy. It even allows you to switch back and forth or mix these in the same project. Please read the chapter about Custom Resources to understand why this is possible in Kluctl.
Push-based GitOps is implemented via the Kluctl CLI, which you can run from your local machine or from a continuous delivery pipeline. Pull based GitOps is implemented via the Kluctl Controller, which takes a KluctlDeployment as input and then performs periodic reconciliation. In the end, both strategies end up using your Git source to perform exactly the same deployment actions.
There are many use-cases where mixing is useful.
One simple example: Running diffs against production, because a diff is actually implemented as a server-side dry-run apply with the diff happening on current/real state vs. simulated/dry-run state. This means, you can locally implement a hot-fix for your production system and verify correctness of the fix by running a diff against production.
Another example is using pull-based GitOps for production and the push-based CLI for development/test environments, allowing you to perform very fast cycles of modify and test iterations, without the need to commit and push your changes just to find out if your change applies successfully.
Bootstrapping/Installation
To start with GitOps, some components must usually be installed into the cluster and optionally on your local machine.
ArgoCD
For ArgoCD, you can apply
some static manifests and install the argocd CLI. After
that, you can either use the UI or the CLI to
add Applications or even additional
clusters.
It’s common to have one ArgoCD instance manage multiple clusters.
The App of Apps pattern allows you to hand over most operations to Git, reducing the amount configuration required in the UI or via the CLI.
Flux
Flux requires a process called bootstrapping to pre-create all necessary Kubernetes manifests in your Git repository and perform an initial apply, resulting in the Flux controllers to start up and then take over reconciliation of that same repository.
As an alternative, the flux-operator can be used to install Flux controllers into your cluster. It will take over and manage the complete lifecycle of your Flux controllers and also handle updates. The operator itself must be installed via other means (e.g. plain Helm or static manifests).
In Flux, it’s common to have one set of controllers on every cluster, while Git repositories might be shared (using different subdirectories).
Kluctl
Kluctl uses a Kluctl deployment project to install the controller into your target cluster. This project is embedded into the CLI and can be deployed via kluctl controller install. As an alternative, you can set up your own Kluctl deployment project that just git includes the actual controller deployment. It’s common to have such a bootstrap deployment to setup the controller and all the other things a cluster requires to function, for example your CNI, cert-manager, ingress/gateway controllers, cloud specific controllers, and so on.
This bootstrap deployment is then simply deployed via kluctl deploy --context my-cluster.
Reconciliation and Drift
Kubernetes controllers typically implement a reconciliation loop that reconciles the actual/current state towards the desired state (defined by a CR). GitOps controllers do the same, with the difference that the CR actually references a source repository (usually Git) which then contains the desired state (instead of putting it directly into the CR).
ArgoCD
ArgoCD supports periodic synchronization and manual synchronization. This means, that the reconciliation loop will do different things depending on how the Application CR is configured. This allows you to adapt different strategies, for example to perform automatic sync for test/staging and only allows manual sync on prod, or vice versa. Sync windows allow you to further customize the behavior. Drift detection is performed in all cases and drift is properly shown in the UI even if syncs are not performed.
ArgoCD seems to try its best to cater many use cases and demands of users with this flexibility.
Flux
Flux only supports periodic synchronization natively. Anything more advanced/customized requires you to somehow control it from the outside world, e.g. via CronJob resources that suspend/resume reconciliation at defined times. Flux only performs drift detection to determine what needs to be re-applied.
Flux tries to adhere to strict GitOps principles and does not accept drift as something that it allows to happen in daily business.
Kluctl
By default, Kluctl does only re-apply resources when the involved source code changes. This somewhat mimics what classical push based continuous delivery is doing. In practice this means that if you change something on the cluster ( e.g. via kubectl or k9s), the change/drift stays intact until something gets changed in the source (usually via a commit + push or merge). This behaviour can be changed in the KluctlDeployment CR to also perform unconditional periodic re-apply.
Drift detection is always happening, even if no re-apply happened. The drift is properly reflected in the KluctlDeployment status and can also be seen in the UI.
The Kluctl project considers drift as something that always might happen in daily business and can even be acceptable or desired. e.g. when fixing a production issues and relying on GitOps to not apply its state (and thus revert the fix) before the fix gets through established processes and workflows (review, CI/CD, …). At the same time, it performs proper drift detection at all times to allow early detection of undesired drift.
Pruning
As your deployments change over time, things will get added, removed and renamed. This causes leftovers on the cluster that must be cleaned up or pruned afterward. If this garbage were left on the cluster, you would be guaranteed to get into trouble long-term.
ArgoCD and Flux
Both projects follow the same strategy. They perform some form of bookkeeping (e.g. by storing lists in the CRs status sub-resource) to remember which resources were applied in the past. This allows them to figure out which resources got removed from the source code and thus need to be pruned.
Both projects also allow you to fully or partially (on resource level via annotations) disable pruning.
Kluctl
Kluctl does not perform bookkeeping but instead marks all applied resources with discriminator labels. These allow Kluctl to efficiently query the cluster for all the resources previously deployed from the given Kluctl deployment project. The query result is then used to determine what got orphaned and thus needs to be pruned. This type of orphan detection has the advantage that it also works without the CRs and the Kluctl Controller and thus can also be leveraged by the CLI.
Pruning can be disabled on KluctlDeployment level and on resource level (also via annotations). Orphan resource detection will however always be performed and reported as part of the drift detection (or manual diff invocations via the CLI).
Helm
Helm is the de-facto standard package manager in Kubernetes. It uses go-templates to implement configurability and Helm Repositories or OCI registries to distribute Helm Charts.
Helm Charts are originally installed via the Helm CLI, which maintains the resulting Helm Releases lifecycle via in-cluster release secrets.
The way Helm Release’s lifecycle was initially meant to be managed is not very friendly to how GitOps is meant to function, which adds a few challenges when combined. This resulted in multiple approaches in the different GitOps solutions, all with their own drawbacks and issues.
ArgoCD
ArgoCD internally uses helm template to render out all manifests. These manifests are then applied to the cluster the
same way as all other static manifests are applied in ArgoCD. Helm Hooks are simulated/re-implemented in ArgoCD to be as
compatible as possible.
This approach leaves full lifecycle management to ArgoCD and does not use any Helm native feature for this. Most
prominent effect of this is that helm list does not list Helm Releases managed by ArgoCD. The advantage on the other
side is that drift detection works out of the box the way you would expect.
Helm values files can be pulled from different source repositories. This means, you could use a publicly released Helm Chart (e.g. cert-manager) from the public repository and at the same time provide your own Helm values from your private repository.
Helm values files are completely static in ArgoCD and can not be further configured. ArgoCD currently does not support post-renderering, which means you can not patch/fix upstream Helm Charts without forking them.
Flux
Flux has a dedicated helm-controller to implement Helm support.
A HelmRelease references a HelmRepository which in turn
contains the URL to a Helm Repository or OCI registry. The controller then uses native Helm features to install, upgrade
and uninstall Helm Releases.
The advantage is that helm list and external tools like helm-dashboard
keep working, because these rely on the Helm Release information stored in the Helm Release secrets.
The disadvantage is that drift detection becomes a lot harder to implement. For a long time, drift detection was completely missing in Flux. It is implemented now, but required a lot of effort to get to this state.
Helm values can be passed via ConfigMaps and Secrets which are usually also managed by the same Flux deployment, allowing you to perform some configuration via Flux’s substitution feature. Post-rendering is fully supported and allows you to patch/fix upstream Helm Charts without forking them.
Kluctl
Kluctl follows a similar approach as ArgoCD. It renders the Helm Charts and then applies the rendered manifests the same way as any other manifest, so that all Kluctl features (e.g. drift detection and pruning) are working as expected. As a step in-between, the manifests are passed through Kustomize to allow patching of upstream Charts.
Helm values are passed via a helm-values.yaml inside your deployment project. Kluctl templating is applied to this
file the same way as it is applied to all other files in your project, allowing you to have very flexible configuration.
Kustomize
Kustomize is an alternative to Helm with a completely different approach. It markets itself as template-free and instead relies on overlays and patches to implement configurability.
ArgoCD
ArgoCD natively supports Kustomize. You can either point your Application to a Git repository containing a self-contained Kustomization project, inline some Kustomize directives into the Application or even mix both approaches.
Flux
Flux also natively supports Kustomize via the dedicated kustomize controller.
Flux also supports post-build variable substitions on top of the native Kustomize features set. With this, some form of lightweight templating is possible even though Kustomize is meant to be template-free. If this feature is used however, the Kustomizations incompatible to native Kustomize, making it harder to test/verify changes without commiting and pushing.
Kluctl
Kluctl uses Kustomize as the low-level building block for deployment items. Everything, including Helm Charts, ends up being processed by Kustomize and the resulting manifests are then applied to the cluster.
Before Kustomize is being invoked, templating is performed on all involved
manifests, including the kustomization.yaml itself. This allows advanced variable substitution (variables come from
different sources) and even conditional
inclusion/exclusion of resources.
This also makes the Kustomizations incompatible to native Kustomize, but still allows to perform all desired actions (diff, deploy, render, …) via the Kluctl CLI.
Dependency management and ordering
Kubernetes manifests are declarative and in most cases the order in which they are applied does not matter, because constant reconciliation will eventually fix all issues that arise in-between. This, however, has limits and does not always work. The most prominent examples are CRDs and Namespaces. You can’t apply a CR before the corresponding CRD is applied and you can’t apply namespaced resources before the namespace is applied.
Reality will always force you in some way or another to deal with deployment order and dependencies. All projects discussed in this post have completely different approaches to this problem.
ArgoCD
ArgoCD implements Sync Waves, which allows you control the order in which resources get applied. Resources with a lower wave number get applied first, then the next highest wave number and so on. For each wave number, ArgoCD waits for healthness of each resource of the current wave.
This gives some good control about the order inside the same Application. Cross-Application sync waves or any other dependency mechanism between Applications is currently not supported.
Flux
Flux supports specifying dependencies in Kustomization and HelmRelease. However, a Kustomization can currently only depend on another Kustomization and a HelmRelease only on another HelmRelease. Cross-dependencies between these are currently not supported.
Health checks on Kustomizations can be specified to control when a Kustomization is considered ready so that applying dependent Kustomizations can be deferred until readiness.
Kluctl
Kluctl by default applies all deployment items in the deployment.yaml in parallel to speed up deployments. When a barrier item is encountered, Kluctl will stop and wait for all previously encountered deployment items to fully apply before it continues with further parallel processing.
This allows you to specify an intuitive and natural ordering. The position in the deployment item list determines the order and thus allows you to easily specify an intent like “deploy operator X and Y with their CRDs in parallel and only after this apply the corresponding CRs”.
Additional deployment item types like waitReadinessObjects allow you to also wait for readiness of individual resources (e.g. an operator implementing a Webhook or performing delayed CRD installation).
Dynamic configuration
Very often, the same deployment needs to be deployed to different environments/clusters but with slightly different configuration. This requires some form of dynamic configuration capabilities offered by the GitOps solution in use. Performing a copy of all manifests and individually changing the differing resources is the worst option.
The next level is to dynamically create deployments (via GitOps CRs) based on some additional source (e.g. Git files or branches). This is for example useful to create preview environments.
ArgoCD
ArgoCD Applications can use Kustomize or Helm to perform configuration. This means, to support multiple environments, you’d have to point the different Applications to different Kustomize overlays or Helm values.
ApplicationSets can be used to dynamically create dynamic Applications based on a generator (e.g. clusters or git files). These Applications can also receive some limited set of variables.
Flux
Flux also uses Kustomize and Helm to perform configuration. You’d either use a Kustomization CR pointing to a specific overlay or a HelmRelease CR with dedicated Helm values.
Post-build variable substitions can be used to inject variables sourced from ConfigMaps or Secrets. This can be used to further configure environments.
Flux itself does not provide dynamic creation of CRs (like ApplicationSets in ArgoCD). You can however use the template-controller from the Kluctl project to create dynamic CRs/environments.
Kluctl
Even though Kluctl supports the same way of configuration via plain Kustomize and Helm as the other solutions, it is generally not recommended due to Kluctl offering its own solution. Kluctl allows to use templating in all involved files inside your deployment project. At the same time, dynamic variable sources can be used to pull in all kinds of configuration sources (e.g. plain YAML files, Git repos, ConfigMaps, Secrets, AWSSecretsManager, Vault, …).
Dynamic creation of KluctlDeployment CRs can either be implemented via native Kluctl (e.g. by using a gitFiles source) or via the template-controller.
Testability
In GitOps, deployments are triggered by commiting and pushing to Git. To avoid pushing broken deployments, some form of testing and/or verification must be present to avoid breaking production (or any other sensible environment).
Using pull requests with proper reviews is usually a good first step to catch many broken deployments. There are however many cases where such a process is not enough, because many effects of changes are not obvious just by looking at the changed manifests/configuration. A prominent example is the renaming of resources, worst case being a namespace, which actually causes deletion and re-creation of resources.
The next step is to introduce staging/testing/preview environments which are used to test out changes first. This however requires a more complex project structure and release process. It can also easily multiply infrastructure costs, making it even harder for smaller companies or teams.
ArgoCD
In addition to the already described approaches, ArgoCD supports manual syncs to prevent breaking sensible environments. With manual syncs, you can push/merge to the production branch and then review the effects on the cluster in the ArgoCD UI. Only if they look good, you would then trigger the sync manually.
The argocd app diff CLI command can also be used to diff a local version of your deployment against the live state in the cluster. This is useful if you want to verify that a change looks good before commiting and pushing it.
Flux
Flux does not support something like manual syncs, which means that if you push/merge to Git, it will be applied to the target environment. This forces you to ensure correctness of deployments before the merge/push happens, e.g. by using one of the previously mentioned methods (pull request reviews and/or staging/prod environments).
The flux diff kustomization CLI command is comparable to
the argocd app diff command described for ArgoCD. It does not support deep diffing of nested Kustomizations. Helm
diffs are also not supported.
Kluctl
Kluctl supports manual deployments which must be approved via the UI (which shows the diff) before they are deployed. This can be used the same way as manual syncs in ArgoCD.
The kluctl diff command can be used to locally dry-run apply and diff a local version of your deployment project. It fully supports nested Kluctl deployment projects.
In addition, kluctl gitops diff can be used to instruct the controller to perform a diff, based on the local version of the deployment project.
UI
Even though GitOps is centered around Git, a UI can be quite useful for additional control and monitoring.
ArgoCD
ArgoCD is well known for its UI and clearly the forerunner here. Everything can be controlled via the UI, including cluster and application management. You can see the state of all applications and the corresponding resources. You can manually sync applications, look into logs of PODs, and much more.
Flux
Flux does not offer an official UI. There are however some non-official UIs available, for example Capacitor. These are however still very rudimentary and only allow simple monitoring and actions (e.g. reconcile).
Kluctl
Kluctl offers an official but still experimental UI. It allows you to monitor and control your KluctlDeployments. You can suspend, resume, reconcile, prune, approve, … your deployments. It shows you historical deployment results (with diffs), current drift, validation state, and much more.
As mentioned, it’s still experimental, but it already showcases the future potential.
Managing Cluster API with Kluctl

Kubernetes started as a very promising container orchestrator and in my opinion it was very clear at day one that it would establish itself and take the market. What was not so obvious to me, was that Kubernetes would also morph into some kind of “API Platform”.
With the introduction of Custom Resource Definitions, all kinds of resources could now be managed by Kubernetes. Controllers and Operators take these Custom Resources and use the reconcile pattern to constantly reconcile the desired state with the real world.
The next step was obvious in hindsight, but still a surprise for me personally: Why not manage Kubernetes Clusters itself from inside Kubernetes Clusters. Cluster API was born.
Implications of Custom Resources
Having something in the form of a Custom Resource also means that it becomes a regular Kubernetes Resource that can be managed with all available tooling in the Kubernetes ecosystem. It can be managed with plain Kubectl, but also with more advances tools like Helm, Flux, ArgoCD or Kluctl.
So, why Kluctl?
Kluctl is general purpose deployment tool for Kubernetes. It allows you to define Kubernetes deployments of any complexity and manage them via a unified CLI and/or an optional GitOps controller. Here a are a few features that make Kluctl interesting for the management of Cluster API based clusters.
- Targets allow you to manage multiple workload clusters with the same Kluctl deployment project.
- Templating allows you to follow a natural project structure, without the need to use overlays and patching to meet simple requirements.
- Deployment projects allow you to reuse parametrised and templated subcomponents without copy-paste.
- Variable sources give you easy to understand and structured configuration for the workload clusters.
- The Kluctl diff command will always tell you if you’re good or not when you change things (because it’s based on a server-side dry-run).
- GitOps is fully supported but also optional. It can even be mixed with a classical push style CLI.
Installing Kluctl
For this tutorial, you’ll need the Kluctl CLI installed. Please follow the instructions here. There is no need to install the GitOps controller or the Webui, but feel free to try these out as well after the tutorial.
Let’s setup cluster-api
In this tutorial, we’ll work completely locally without any cloud resources being involved. This means, we’re using Kind and the CAPD (Cluster API Docker) infrastructure provider. In the real world, you’ll need to adapt the principles learned here to a proper Cluster API infrastructure provider.
First, lets set up a local Kind cluster. If you don’t have Kind installed yet, read through the installation instructions.
The CAPD provider will need access to the host Docker daemon from inside the Kind cluster. To give access, you’ll need to pass through the Docker unix socket. This can be done by using a custom Kind configuration:
# contents of kind-config.yaml
kind: Cluster
apiVersion: kind.x-k8s.io/v1alpha4
networking:
  ipFamily: dual
nodes:
- role: control-plane
  extraMounts:
    - hostPath: /var/run/docker.sock
      containerPath: /var/run/docker.sock
Now create the cluster with the above config:
$ kind create cluster --config kind-config.yaml
Creating cluster "kind" ...
 ✓ Ensuring node image (kindest/node:v1.29.2) 🖼
 ✓ Preparing nodes 📦
 ✓ Writing configuration 📜
 ✓ Starting control-plane 🕹️
 ✓ Installing CNI 🔌
 ✓ Installing StorageClass 💾
Set kubectl context to "kind-kind"
You can now use your cluster with:

kubectl cluster-info --context kind-kind

Have a nice day! 👋
The current Kubernetes Context will be set to kind-kind, which is what we’ll from now on use to install Cluster API to. Let’s do that:
$ clusterctl init --infrastructure docker
Fetching providers
Installing cert-manager Version="v1.13.2"
Waiting for cert-manager to be available...
Installing Provider="cluster-api" Version="v1.6.1" TargetNamespace="capi-system"
Installing Provider="bootstrap-kubeadm" Version="v1.6.1" TargetNamespace="capi-kubeadm-bootstrap-system"
Installing Provider="control-plane-kubeadm" Version="v1.6.1" TargetNamespace="capi-kubeadm-control-plane-system"
Installing Provider="infrastructure-docker" Version="v1.6.1" TargetNamespace="capd-system"

Your management cluster has been initialized successfully!

You can now create your first workload cluster by running the following:

  clusterctl generate cluster [name] --kubernetes-version [version] | kubectl apply -f -
We now have a fully functional Cluster API installation that is able to provision and manage workload clusters in the form of Docker Containers.
Basic project structure
Let’s talk about the basic Kluctl project structure that we’ll follow for this tutorial. You can find the full project at https://github.com/kluctl/cluster-api-demo. This repository contains multiple subdirectories with different versions of the project. The first version, as described in this and the next section, is inside 1-initial.
The root directory will contain 2 files.
The first one is the .kluctl.yaml file, which specifies which targets exists. A target defines where/what to deploy with a Kluctl project and can be anything you want. In a classical application deployment, it would be the target environment. In this case, a target represents a Cluster API workload cluster, deployed to a Cluster API management cluster (our Kind cluster). It serves as the entrypoint to configuration management and will later allow us to load cluster specific configuration.
# content of .kluctl.yaml
targets:
  - name: demo-1
    context: kind-kind
  - name: demo-2
    context: kind-kind

discriminator: capi-{{ target.name }}
You can also see the first use of templating here in the discriminator. The discriminator is later used to differentiate resources that have been applied to the cluster before. This is useful for cleanup tasks like pruning or deletion.
The second file is the deployment.yaml, which defines the actual deployment project. It includes Kustomize deployments, Helm Charts and other sub-deployment projects.
# content of deployment.yaml
deployments:
  - include: clusters

commonAnnotations:
  kluctl.io/force-managed: "true"
This will include a sub-deployment in the directory “clusters”. Inside this directory, there must be another deployment.yaml. The annotation found in commonAnnotations will cause Kluctl to always consider resources as managed by Kluctl. This is required because Cluster API claims ownership of resources even though it is not in control of those.
# content of clusters/deployment.yaml
deployments:
  - path: {{ target.name }}
This will include a Kustomize deployment from the directory that is resolved via the template {{ target.name }}. “target” is a global variable that is always present, and it allows you to access the properties used in the current target, defined in the .kluctl.yaml from above. This means, if you later deploy the target “demo-1”, Kluctl will load the Kustomize deployment found in the “clusters/demo-1” folder.
Creating a workload cluster
Now, create the following files in the clusters/demo-1 directory:
# contents of clusters/demo-1/kustomization.yaml
resources:
  - namespace.yaml
  - cluster.yaml
  - control-plane.yaml
  - workers.yaml
The above file is a regular kustomization.yaml that includes the actual resources. Kluctl fully supports Kustomize and all its features. You can also omit the kustomization.yaml in most cases, causing Kluctl to auto-generate the kustomization.yaml. In this case however, this is not recommended as the order is important here: The namespace must be deployed before anything else.
# contents clusters/demo-1/namespace.yaml
apiVersion: v1
kind: Namespace
metadata:
  name: cluster-demo-1
We create a dedicated namespace for this cluster. We will also create more namespaces later for every other cluster.
# contents of clusters/demo-1/cluster.yaml
apiVersion: cluster.x-k8s.io/v1beta1
kind: Cluster
metadata:
  name: "demo-1"
  namespace: "cluster-demo-1"
spec:
  clusterNetwork:
    services:
      cidrBlocks: ["10.128.0.0/12"]
    pods:
      cidrBlocks: ["192.168.0.0/16"]
    serviceDomain: "cluster.local"
  infrastructureRef:
    apiVersion: infrastructure.cluster.x-k8s.io/v1beta1
    kind: DockerCluster
    name: "demo-1"
    namespace: "cluster-demo-1"
  controlPlaneRef:
    kind: KubeadmControlPlane
    apiVersion: controlplane.cluster.x-k8s.io/v1beta1
    name: "demo-1-control-plane"
    namespace: "cluster-demo-1"
---
apiVersion: infrastructure.cluster.x-k8s.io/v1beta1
kind: DockerCluster
metadata:
  name: "demo-1"
  namespace: "cluster-demo-1"
The above file describes a Cluster and a DockerCluster. Please note that we are not using Cluster Topology (ClusterClass) features. I will later explain why.
# contents of clusters/demo-1/control-plane.yaml
kind: KubeadmControlPlane
apiVersion: controlplane.cluster.x-k8s.io/v1beta1
metadata:
  name: "demo-1-control-plane"
  namespace: "cluster-demo-1"
spec:
  replicas: 1
  machineTemplate:
    infrastructureRef:
      kind: DockerMachineTemplate
      apiVersion: infrastructure.cluster.x-k8s.io/v1beta1
      name: "demo-1-control-plane"
      namespace: "cluster-demo-1"
  kubeadmConfigSpec:
    clusterConfiguration:
      controllerManager:
        extraArgs:
          enable-hostpath-provisioner: 'true'
      apiServer:
        certSANs: [localhost, 127.0.0.1, 0.0.0.0]
    initConfiguration:
      nodeRegistration:
        criSocket: /var/run/containerd/containerd.sock
        kubeletExtraArgs:
          cgroup-driver: systemd
          eviction-hard: 'nodefs.available<0%,nodefs.inodesFree<0%,imagefs.available<0%'
    joinConfiguration:
      nodeRegistration:
        criSocket: /var/run/containerd/containerd.sock
        kubeletExtraArgs:
          cgroup-driver: systemd
          eviction-hard: 'nodefs.available<0%,nodefs.inodesFree<0%,imagefs.available<0%'
  version: "1.29.0"
---
apiVersion: infrastructure.cluster.x-k8s.io/v1beta1
kind: DockerMachineTemplate
metadata:
  name: "demo-1-control-plane"
  namespace: "cluster-demo-1"
spec:
  template:
    spec:
      extraMounts:
        - containerPath: "/var/run/docker.sock"
          hostPath: "/var/run/docker.sock"
The above file describes a KubeadmControlPlane and a DockerMachineTemplate for the control plane nodes.
# contents of clusters/demo-1/workers.yaml
apiVersion: infrastructure.cluster.x-k8s.io/v1beta1
kind: DockerMachineTemplate
metadata:
  name: "demo-1-md-0"
  namespace: "cluster-demo-1"
spec:
  template:
    spec: {}
---
apiVersion: bootstrap.cluster.x-k8s.io/v1beta1
kind: KubeadmConfigTemplate
metadata:
  name: "demo-1-md-0"
  namespace: "cluster-demo-1"
spec:
  template:
    spec:
      joinConfiguration:
        nodeRegistration:
          kubeletExtraArgs:
            cgroup-driver: systemd
            eviction-hard: 'nodefs.available<0%,nodefs.inodesFree<0%,imagefs.available<0%'
---
apiVersion: cluster.x-k8s.io/v1beta1
kind: MachineDeployment
metadata:
  name: "demo-1-md-0"
spec:
  clusterName: "demo-1"
  replicas: 1
  selector:
    matchLabels:
  template:
    spec:
      clusterName: "demo-1"
      version:  "1.29.0"
      bootstrap:
        configRef:
          name: "demo-1-md-0"
          namespace: "cluster-demo-1"
          apiVersion: bootstrap.cluster.x-k8s.io/v1beta1
          kind: KubeadmConfigTemplate
      infrastructureRef:
        name: "demo-1-md-0"
        namespace: "cluster-demo-1"
        apiVersion: infrastructure.cluster.x-k8s.io/v1beta1
        kind: DockerMachineTemplate
The above file describes everything needed to create a pool of nodes. This includes a DockerMachineTemplate, a KubeadmConfigTemplate and a MachineDeployment.
Deploying the workload cluster
We now have a working Kluctl Deployment Project that can be deployed via the Kluctl CLI (we will later also explore GitOps). Execute the following command:
$ kluctl deploy -t demo-1
This will perform a dry-run, show the diff and then after confirmation do the actual deployment. The dry-run will produce a few errors as the underlying server-side dry-run is not perfect in combination with Cluster API, you can ignore these errors and simply confirm.
After a few minutes, the workload cluster should be ready with one control-plane node and one worker node, all running as Docker containers. We now need to get the kubeconfig of this cluster.
$ kind get kubeconfig --name demo-1 > demo-1.kubeconfig
You can now test access to the workload cluster:
$ kubectl --kubeconfig=demo-1.kubeconfig get node
NAME                         STATUS     ROLES           AGE   VERSION
demo-1-control-plane-bjfvn   NotReady   control-plane   47m   v1.29.0
demo-1-md-0-mtcpn-wnb8v      NotReady   <none>          21m   v1.29.0
This will reveal that the cluster is currently not fully functional, simply because a working CNI is missing. To install a CNI, run:
$ kubectl --kubeconfig=./demo-1.kubeconfig \
    apply -f https://raw.githubusercontent.com/projectcalico/calico/v3.26.1/manifests/calico.yaml
After a few seconds, re-running the above get node command will show that nodes are ready.
Modifying the workload cluster
You can now try to modify something in the workload cluster manifests.
Lets increase the workers MachineDeployment replicas to 2. You can do this by editing clusters/demo-1/workers.yaml with your favorite editor, search for the MashineDeployment resource and replace replicas: 1 with replicas: 2.
Now, let’s deploy this change. We will now start to see the first benefits from Kluctl, specifically the dry-run and diff that happens before we deploy something. You will need to confirm the deployment by pressing y.
$ kluctl deploy -t demo-1
✓ Loading kluctl project-api-demo/1-initial
✓ Initializing k8s client
✓ Rendering templates
✓ Rendering Helm Charts
✓ Building kustomize objects
✓ Postprocessing objects
✓ Writing rendered objects
✓ Getting remote objects by discriminator
✓ Getting namespaces
✓ demo-1: Applied 8 objects.

Changed objects:
  cluster-demo-1/MachineDeployment/demo-1-md-0


Diff for object cluster-demo-1/MachineDeployment/demo-1-md-0
+---------------+----------------------------------------------------------------------------------+
| Path          | Diff                                                                             |
+---------------+----------------------------------------------------------------------------------+
| spec.replicas | -1                                                                               |
|               | +2                                                                               |
+---------------+----------------------------------------------------------------------------------+
✓ The diff succeeded, do you want to proceed? (y/N) y
✓ demo-1: Applied 8 objects.
✓ Writing command result

Changed objects:
  cluster-demo-1/MachineDeployment/demo-1-md-0


Diff for object cluster-demo-1/MachineDeployment/demo-1-md-0
+---------------+----------------------------------------------------------------------------------+
| Path          | Diff                                                                             |
+---------------+----------------------------------------------------------------------------------+
| spec.replicas | -1                                                                               |
|               | +2                                                                               |
+---------------+----------------------------------------------------------------------------------+
If you check the Cluster API management cluster, you will see that a new node will appear now.
$ kubectl --kubeconfig=demo-1.kubeconfig get node
demo-1-control-plane-bjfvn   Ready      control-plane   12h   v1.29.0
demo-1-md-0-mtcpn-n2jdt      NotReady   <none>          20s   v1.29.0
demo-1-md-0-mtcpn-wnb8v      Ready      <none>          12h   v1.29.0
Add and remove node pools
You can also try more types of modifications. It gets especially interesting when you start to add or remove resources, for example if you add another node pool by copying workers.yaml to workers-2.yaml (don’t forget to also update kustomization.yaml) and replace all occurrences of md-0 with md-1. When you deploy this, Kluctl will show you that new resources will be created and actually create these after confirmation.
If you tried this, also try to delete workers-2.yaml again and then see what kluctl deploy -t demo-1 will do. It will inform you about the orphaned resources, which you then can prune via kluctl prune -t demo-1. Pruning can also be combined with deploying via kluctl deploy -t demo-1 --prune. We won’t get into more detail at this point, because this will get more clear and powerful when we combine this with templating in the next section.
Introducing templating
So far, we’ve only used very static manifests. To introduce new clusters, or even node pools, we’d have to do a lot of copy-paste while replacing names everywhere. This is of course not considered best practice and we should seek for a better way. Cluster API has an experimental feature called cluster classes which tries to solve this problem. We’ll however not use these in this tutorial and instead rely on Kluctl’s templating functionality to solve the same requirements. A later section will also explain why templating is a viable alternative to ClusterClass.
The following changes to the project structure and files can also be found in the same repository already mentioned before, but inside the 2-templating directory.
Preparing some templated deployments
We will now introduce two reusable and templated Kustomize deployments for the cluster iteself and its workers. The cluster deployment is meant to be included once for per cluster. The workers deployment can be included multiple times, depending on how many different worker node pools you need.
Let’s start by moving kustomization.yaml, namespace.yaml, cluster.yaml and control-plane.yaml into templates/cluster/. Also remove workers.yaml from the resources list in kustomization.yaml. This will be the cluster deployment.
Now, replace all occurrences of demo-1 with {{ cluster.name }} in all the manifests found in the templates/cluster directory. Also, in the KubeadmControlPlane inside control-plane.yaml, replace replicas: 1 with {{ cluster.replicas }}. This introduces some simple Jinja2 templating to inject the cluster name. The global cluster variable seen here will be introduced later.
Next, move the workers.yaml manifest into templates/workers. This time, there is no need for a kustomization.yaml as we don’t care about deployment order here (there is no namespace involved here), which means we can allow Kluctl to auto-generate it. Then, replace all occurences of demo-1 with {{ cluster.name }} and all occurrences of md-0 with {{ workers.name }}. Finally, find replicas: 1 (or whatever you set it to before) and replace it with replicas: {{ workers.replicas }}.
Please note that this tutorial keeps the amount of configuration possible in these deployments to a minimum. You can maybe imagine that a lot can be achieved via templating here. For example, AWS or Azure instance types could be configured via {{ workers.instanceType }}.
Also, a real world example might consider putting the cluster/worker templates in seprate git repositories and including them via git or oci includes. Both will allow you to implement versioning and other best practices for the templates.
Using the templated deployments
The previously prepared templated deployments can now be included as often as you want, with different configuration.
For this to work, we must however change the clusters/demo-1 Kustomize deployment to become an included sub-deployment. Replace path with include inside clusters/deployment.yaml:
# content of clusters/deployment.yaml
deployments:
  - include: {{ target.name }}
Now, create a deployment.yaml inside clusers/demo-1:
# content of clusters/demo-1/deployment.yaml
vars:
  - values:
      cluster:
        name: demo-1
        replicas: 1

deployments:
  - path: ../../templates/cluster
  - barrier: true
  - path: ../../templates/workers
    vars:
      - values:
          workers:
            name: md-0
            replicas: 1
  - path: ../../templates/workers
    vars:
      - values:
          workers:
            name: md-1
            replicas: 2
The above sub-deployment defines some global configuration (e.g. cluster.name) and includes the two previously prepared Kustomize deployments. The cluster level configuration is loaded on sub-deployment level so that all items in deployments have access to the configuration found there. The worker specific configuration is specified in-line as part of the deployment item itself. This way, each workers item can have its own configuration (e.g. own name and replicas), which is also demonstrated here by introducing a new node pool.
You’ll also find a barrier in the list of deployment items. This barrier ensures that Kluctl does not continue deploying worker resources before the cluster resources are applied already.
Deploying the refactored workload cluster
Simply re-run the deploy command:
$ kluctl deploy -t demo-1
✓ Loading kluctl project
✓ Initializing k8s client
✓ Rendering templates
✓ Rendering Helm Charts
✓ Building kustomize objects
✓ Postprocessing objects
✓ Writing rendered objects
✓ Getting remote objects by discriminator
✓ Getting namespaces
✓ ../../templates/workers: Applied 3 objects.
✓ ../../templates/cluster: Applied 5 objects.

Changed objects:
  Namespace/cluster-demo-1
  cluster-demo-1/KubeadmConfigTemplate/demo-1-md-0
  cluster-demo-1/Cluster/demo-1
  cluster-demo-1/MachineDeployment/demo-1-md-0
  cluster-demo-1/KubeadmControlPlane/demo-1-control-plane
  cluster-demo-1/DockerCluster/demo-1
  cluster-demo-1/DockerMachineTemplate/demo-1-control-plane
  cluster-demo-1/DockerMachineTemplate/demo-1-md-0

Diff for object Namespace/cluster-demo-1
+-------------------------------------------------------+------------------------------------------+
| Path                                                  | Diff                                     |
+-------------------------------------------------------+------------------------------------------+
| metadata.annotations["kluctl.io/deployment-item-dir"] | -1-initial/clusters/demo-1               |
|                                                       | +2-templating/templates/cluster          |
+-------------------------------------------------------+------------------------------------------+
| metadata.labels["kluctl.io/tag-0"]                    | -clusters                                |
|                                                       | +demo-1                                  |
+-------------------------------------------------------+------------------------------------------+
...
You’ll see a lot of changes in regard to tags and the kluctl.io/deployment-item-dir annotation. These are happening due to the movement of manifests and can be ignored for this tutorial. Simply confirm and let it deploy it.
You should also see that the new workers are being created. You could now try to experiment a little bit by adding more workers or removing old ones. Kluctl will always support you by showing what is new and what got orphaned, allowing you to prune these either via kluctl prune -t demo-1 or via kluctl deploy -t demo-1 --prune.
Adding more clusters
Adding more clusters is hopefully self-explanatory at this point. It’s basically just copying the demo-1 directory, changing the cluster name in deployment.yaml and adding a new target in .kluctl.yaml.
Introducing GitOps
If you prefer to manage your workload clusters via GitOps, the same Kluctl project can be re-used via a simple KluctlDeployment pointing to your Git repository. We won’t go into more detail about GitOps here, but feel free to read the documentation and try it on your own. Moving to GitOps doesn’t mean that you have to do a full buy-in, as you’ll always be able to mix non-GitOp related workflows with GitOps workflows. For example, a kluctl diff / kluctl gitops diff can always be used even if the same deployment is already managed via GitOps.
Kluctl vs. ClusterClass
You might ask why one would use Kluctl instead of simply relying on ClusterClass, which is a cluster-api native way of achieving reusability. There are multiple reasons why I believe that Kluctl is a good alternative to ClusterClass, let’s go through a few of them.
Generic solution
Kluctl is a very generic solution for templated deployments. This means, you can implement a lot of different ways and scenarios that meet different needs. If you already use Kluctl somewhere else, or consider using it somewhere else, you’ll easily get used to managing Cluster API via Kluctl. With ClusterClass, you have to learn a new and very Cluster API specific way of templating.
I also believe that it’s very likely that you will end up using at least some additional tool on top of the Cluster API manifests, simply because plain kubectl apply -f ... is not the best way to do it. Classically, this would be Kustomize or Helm. If GitOps is desired, you might also end up using Flux or ArgoCD. So, if this additional layer of tooling is already required, why not give Kluctl a try and while at it, completely avoid uses of ClusterClass with it.
Not limited to Cluster API resources
With ClusterClass, you can only glue together Cluster API related resources. A cluster might however need much more, for example an instance of Cluster Autoscaler. With ClusterClass, the only option you have is to use a ClusterResourceSet that deploys plain manifests to the workload cluster. These CRSs are however not templated, which will limit you quite a bit in what can be achieved. Also, you must use plain manifests and can’t use Helm Charts, which means that the burden of keeping manifests up-to-date is on you. Also, CRSs only allow to deploy additional resource to the workload cluster, but not into the management cluster itself.
With Kluctl, you can use whatever resources you want for the cluster and/or worker templates. Adding Cluster Autoscaler becomes as easy as adding a Helm Chart with proper Helm values (which can also use the cluster configuration via templating).
Migrations/Modifications to cluster templates
Changing a ClusterClass is a risky thing and in my opinion it is crucial to have proper dry-run and diff capabilites. With ClusterClass, this is supported to some degree but hard to use and not 100% reliable. With Kluctl, testing changes becomes as easy as changing something and then running kluctl diff -t demo-1.
Wrapping it up
If you want to try out the results of this tutorial without copy-pasing all the YAML, simply clone https://github.com/kluctl/cluster-api-demo and follow the instructions in the README.md.
For a more generic explanation of what Kluctl can do, watch this live demo at the Rawkode Academy YouTube channel. The documentation at https://kluctl.io/docs/ is also worthwhile to read.
You can also join the projects #kluctl channel in the CNCF Slack and get in contact with existing users and maintainers.
Introducing the Kluctl Webui
This blog post serves as an introduction and a tutorial for the new Kluctl Webui, which marks the next milestone in the Kluctl Ecosystem. It gives you visibility and control over your Kluctl deployments, no matter if these happen through your local command line, a CI/CD pipeline or the Kluctl GitOps Controller.
The Webui has been released as part of the v2.21.0 release of Kluctl.
What is Kluctl?
In case this is the first time you heard about Kluctl, lets take a few steps back and first give a short introduction what Kluctl actually is. Kluctl is a tool that allows you to declaratively describe and define your Kubernetes deployments. Kluctl deployments are built from deployment items (e.g. Helm Charts or Kustomize).
Variable Sources of all kinds (e.g. file, Git, Vault, K8s Secrets, …) together with templating allow you to glue together everything and implement proper configuration and multi-environment + multi-cluster support.
At the same time, it provides you with a unified interface to these deployments, based on targets.
Targets are deployed via the command line or via GitOps.
Why a Webui?
Kluctl already works great when used via the CLI tool or as a GitOps solution. It can however become hard to monitor and manage your deployment if only CLI tools are available. Getting an overview of the state (drift, history, warnings, errors, …) of all deployments is much more effective when done on a visual basis.
Preparations
Let’s begin with installing Kluctl, creating a local cluster and creating/forking a simple Kluctl project.
Installing Kluctl
You will of course need the Kluctl CLI to be installed. You can follow the instructions found here (only install the CLI for now).
Create the cluster
Now, let’s create a local cluster. We’re going to use Kind for this:
$ kind create cluster
Creating cluster "kind" ...
 ✓ Ensuring node image (kindest/node:v1.27.3) 🖼
 ✓ Preparing nodes 📦
 ✓ Writing configuration 📜
 ✓ Starting control-plane 🕹️
 ✓ Installing CNI 🔌
 ✓ Installing StorageClass 💾
Set kubectl context to "kind-kind"
You can now use your cluster with:

kubectl cluster-info --context kind-kind

Thanks for using kind! 😊
Fork the kluctl-examples repo
To be able to fully follow this tutorial, it’s advised to fork the kluctl-examples repository into your personal GitHub account.

Make sure that the forked repository is publicly accessible (which is the default) so that the Kluctl Controller can later pull from it.
From now on, whenever this tutorial refers to the kluctl-examples repository, use your forked repository.
Also, watch out for <username> in repository URLs and replace them accordingly with your own username.
Clone the forked repository
Clone the forked repository (watch out for <username> in the URL, as mentioned above):
$ git clone git@github.com:<username>/kluctl-examples.git
$ cd kluctl-examples/simple
All commands shown from now on are meant to be run in the simple sub-directory.
Starting the Webui
The Webui can be run in different ways. The easiest way is to simply run it locally:
$ kluctl webui run
kluctl webui run
ⓘ Webui is available at: http://localhost:8080
ⓘ Opening browser
...
This will open the Webui in your browser. In case it shows an error message in regard to the port being used already, use
the --port argument to use another port.
The Webui will at first be empty and show no targets and no deployment results.
Play with the Kluctl CLI
Initial deployment
The Webui will show all past deployments that happened, including deployments performed by the CLI and GitOps. Let’s see this in action:
$ kluctl deploy -t simple
...
New objects:
  Namespace/simple
  simple/Service/nginx
  simple/Deployment/nginx-deployment
...
The above command will first perform a dry-run and ask for confirmation after showing the diff. Press y to confirm the
deployment. After that, it will show the another diff, which should match the diff from before. This way, you can verify
that it actually did what it announced before.
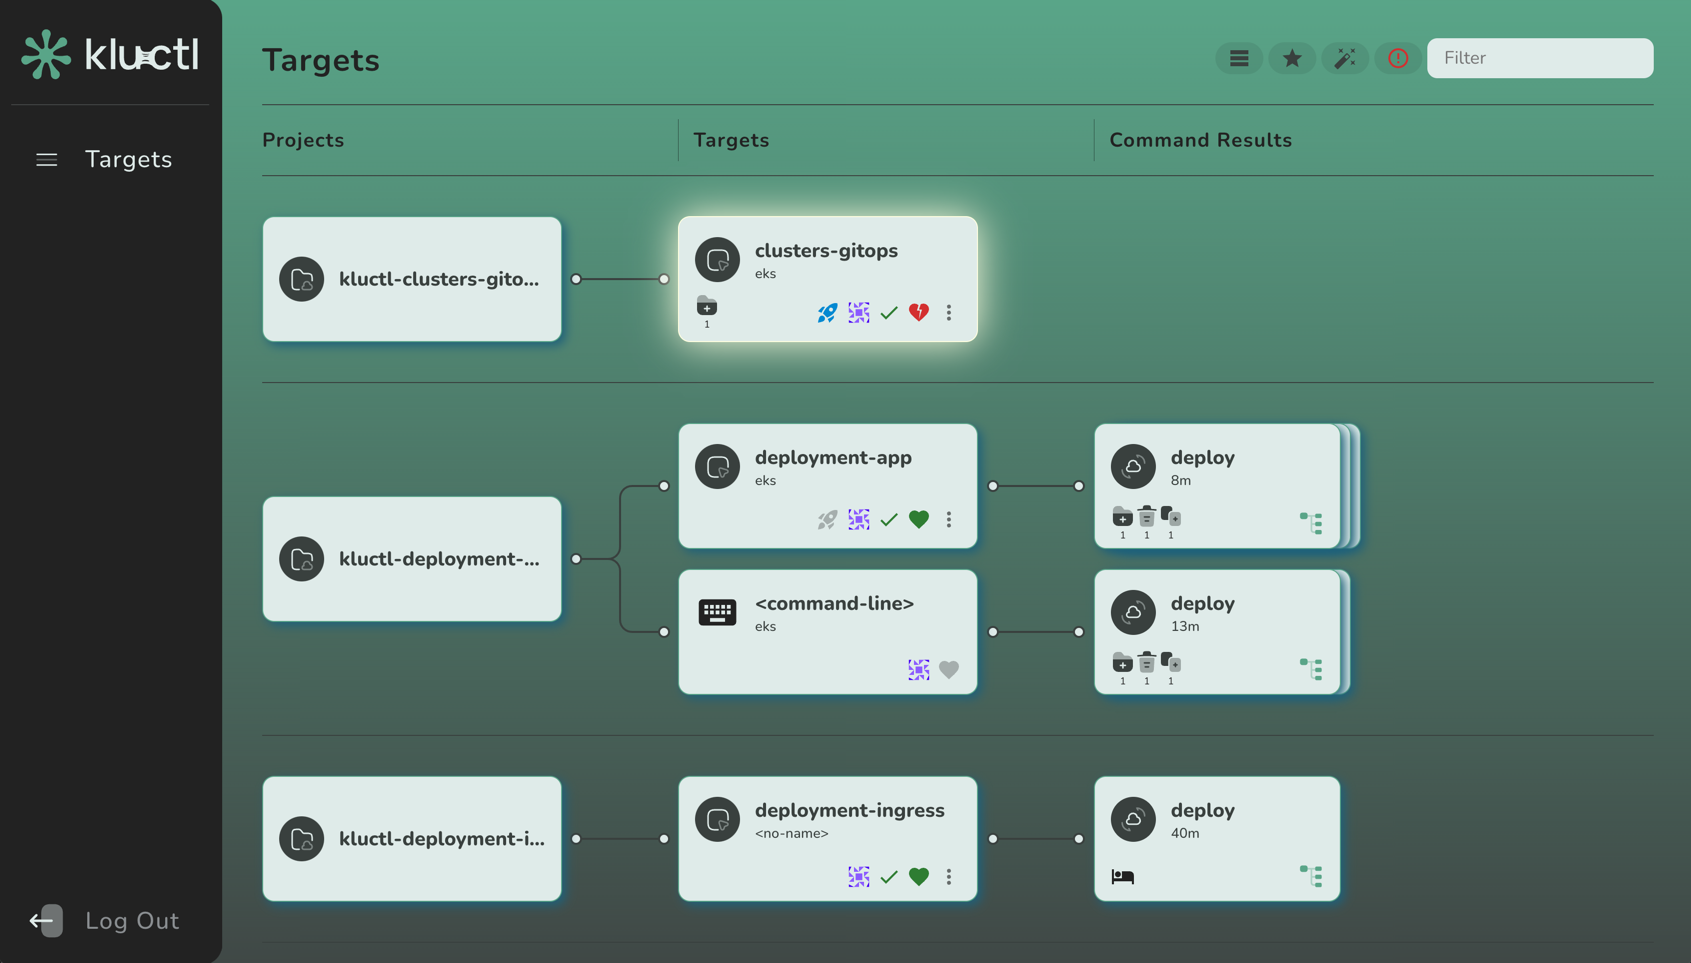
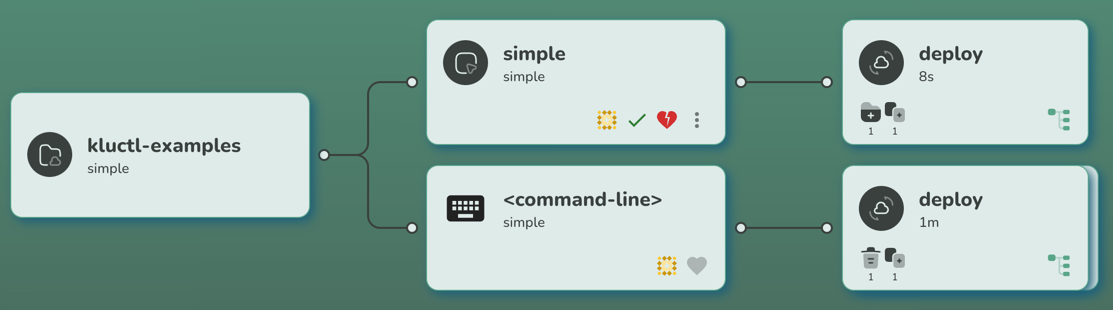
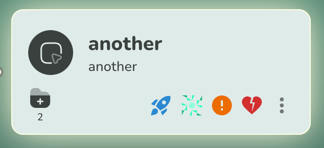
After the above command is finished, the Webui will update immediately and show you three cards:
The first one represents the Git project. If you point your mouse curser on it, it will give you a few more details (e.g. URL and sub-directory).
The second card represents the target. It is defined in the
.kluctl.yaml
of the project and named simple. You can click on this card to get some information about the target (this will get more
interesting with GitOps).
The third card represents the result of the kluctl deploy invocation. You can click on it to get more information.
In this case, you can for example see that the deployment resulted in many new objects being created. If you click on the
tree icon on the bottom right of the card, you can examine the rendered deployment manifests and finally applied resources.
Perform some changes
Now let’s change something and re-deploy it. Use your favourite IDE/editor to perform whatever modification you like.
As an alternative, simply run the following commands to do some yq (which must be installed) magic:
$ yq -i '.spec.replicas=1' deployment/nginx/deploy.yml
$ yq -i '.spec.template.spec.containers[0].ports[0].containerPort=8080' deployment/nginx/deploy.yml
$ yq -i 'del(.resources[2])' deployment/nginx/kustomization.yml
Now let’s deploy this (don’t forget to confirm with y) and see what happens:
$ kluctl deploy -t simple --prune
...
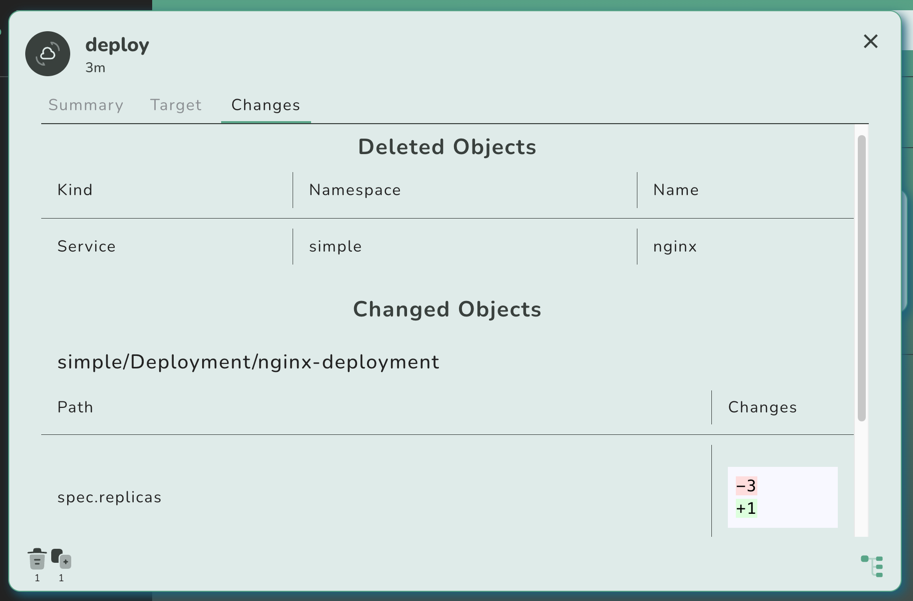
Changed objects:
simple/Deployment/nginx-deployment
Diff for object simple/Deployment/nginx-deployment
+---------------------------------------------------------+-------+
| Path | Diff |
+---------------------------------------------------------+-------+
| spec.replicas | -3 |
| | +1 |
+---------------------------------------------------------+-------+
| spec.template.spec.containers[0].ports[0].containerPort | -80 |
| | +8080 |
+---------------------------------------------------------+-------+
Deleted objects:
simple/Service/nginx
...
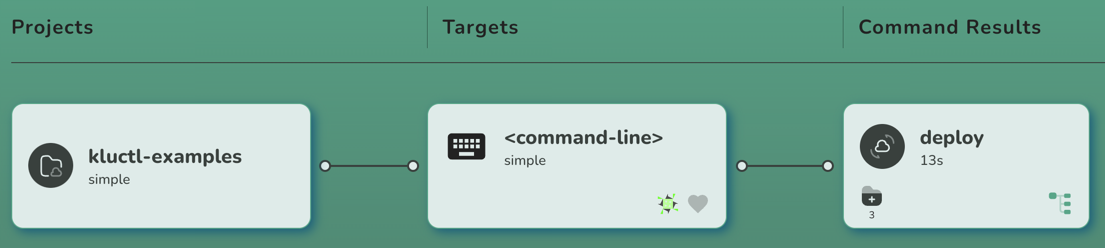
After the deployment is finished, the Webui should update again:
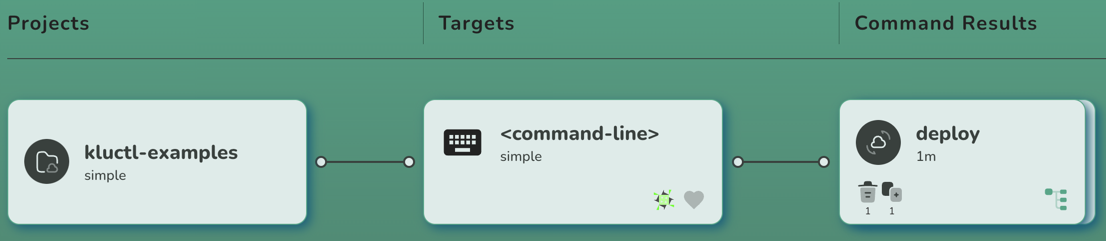
If you click on the new result card, you should see the same changes being shown as already printed to the console:
Introduce GitOps
Now let’s introduce GitOps, so that our deployment is automatically deployed whenever changes get pushed to the (forked) Git repository.
Install the Kluctl Controller
Let’s first install the Kluctl Controller by
invoking the kluctl controller install command:
$ kluctl controller install
...
New objects:
  Namespace/kluctl-system
  kluctl-system/ServiceAccount/kluctl-controller
  CustomResourceDefinition/kluctldeployments.gitops.kluctl.io
  kluctl-system/Deployment/kluctl-controller
...
You now have the controller running in the cluster, waiting for KluctlDeployment custom resources to be deployed.
At this point, you might need to restart the Kluctl Webui due to a minor bug, which prevents it to know about the
freshly installed KluctlDeployment CRD. Please restart the Webui by pressing CTRL+C in the terminal that runs it
and then start it again. This issue will be fixed in a later version of the Webui.
Create the first GitOps deployment
Create the file kluctl-gitops.yaml with the following content (replace <username> with your username):
# file: kluctl-gitops.yaml
apiVersion: gitops.kluctl.io/v1beta1
kind: KluctlDeployment
metadata:
  name: simple
  namespace: kluctl-system
spec:
  interval: 1m
  timeout: 1m
  source:
    url: https://github.com/<username>/kluctl-examples
    path: simple
  target: simple
  context: default
  prune: true
Now apply it via kubectl apply. Please note, that in the real-world, you would use a dedicated Kluctl project to deploy and manage
the KluctlDeployment resources.
$ kubectl apply -f kluctl-gitops.yaml
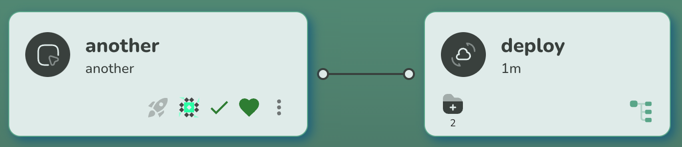
Now wait for a few seconds until the first reconciliation has finished. You will then see the Webui updating itself again,
this time by adding another target card that represents the new KluctlDeployment.
If you click on the new result card (the one right to the simple target card), you will notice that the controller
has reverted all changes we did through the most recent kluctl deploy invocation:
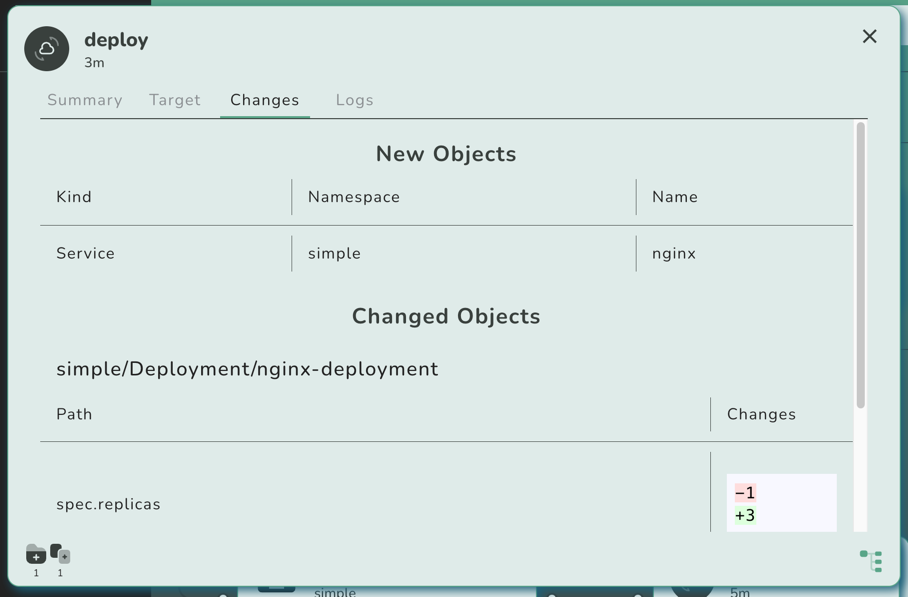
This is because the controller has now deployed the most recent state found in the Git repository, not knowing anything about our local changes.
You might also notice that the target card shows a red and broken heart, indicating that the deployment is unhealthy.
This is because right after the deployment has been performed, the nginx replicas are not fully up-to-date yet,
causing the validation to fail initially. The target will become green after a minute or so, whenever the next
reconciliation/validation finishes.
Commit and push!
Now let’s commit and push our changes:
$ git add deployment/nginx/deploy.yml deployment/nginx/kustomization.yml
$ git commit -m "some changes"
$ git push origin
Now wait a few seconds (up to a minute, due to the interval in the KluctlDeployment) until the changes get re-deployed.
You can speed this up by performing a manual reconciliation attempt:
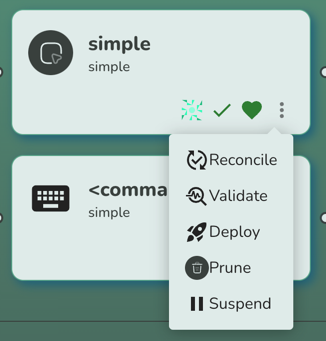
As you can see, you can also request a manual deployment, pruning and validation via the actions menu. Suspension is
also possible, which internally sets the spec.suspend field to true.
Cause some drift
By default, the Kluctl Controller only performs a deployment when a reconciliation attempt detects a change in the rendered manifests. Practically, this means that deployments only happen when you change something in the Git repository.
This also means, that the deployed objects can drift away on the cluster, for example because someone changed the objects manually or because some unrelated operator/controller decided to touch your resources.
Let’s simulate this with a kubectl patch:
$ kubectl -n simple patch deployments nginx-deployment --patch '{"spec": {"replicas": 3}}'
The next reconciliation attempt will reveal the now introduced drift:

If you click on the target card, you’ll see how exactly the deployment drifted (you’ll see the spec.replicas changed).
By default, the controller will not fix the drift until some source code changes. You can change this behaviour by
setting spec.deployInterval in the KluctlDeployment.
To fix the drift without a source change, simply request a manual deployment through the actions menu.
Manual Deployments
In some situations, it is not desired to have fully automated deployments every time the source code changes. There could be different reasons for this, for example because timing of the deployment is important (e.g., not in business hours!).
In that case, you can set a KluctlDeployment to be manual. Do this by setting the
spec.manual field of the KluctlDeployment to true.
Let’s introduce another KluctlDeployment that deploys a different target
that is configured to be manual. Luckily, the .kluctl.yaml
of the project already defines another target.
Let’s create a new KluctlDeployment manifest (kluctl-gitops-another.yaml) that uses this target.
# file: kluctl-gitops-another.yaml
apiVersion: gitops.kluctl.io/v1beta1
kind: KluctlDeployment
metadata:
  name: another
  namespace: kluctl-system
spec:
  interval: 1m
  timeout: 1m
  source:
    url: https://github.com/<username>/kluctl-examples
    path: simple
  target: another
  context: default
  prune: true
  manual: true
Apply it with kubectl apply:
$ kubectl apply -f kluctl-gitops-another.yaml
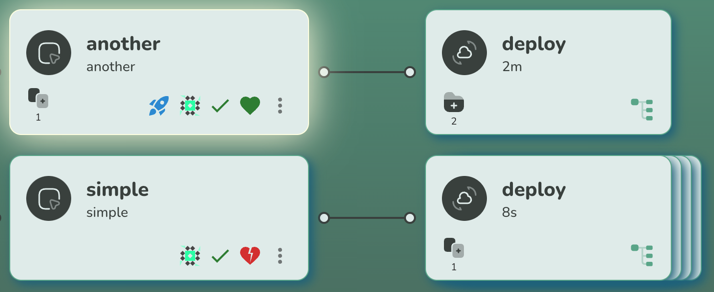
Shortly after this, you should see the following target appear:
The target is currently unhealthy and drifted. This is because the controller won’t even do the initial deployment automatically. Only after you click the blue rocket button, the controller will perform the deployment. After clicking the rocket, you’ll see the first command result card appear.
Now let’s change something (upgrade nginx) and push it:
$ yq -i '.spec.template.spec.containers[0].image="nginx:1.25.2"' deployment/nginx/deploy.yml
$ git add deployment/nginx/deploy.yml
$ git commit -m "upgrade nginx"
$ git push origin
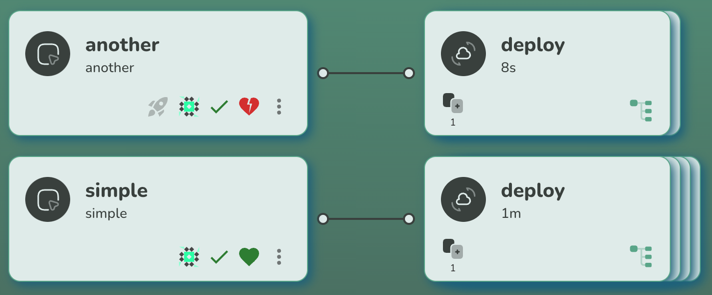
Now, if you wait long enough, you’ll see two things. First, the older simple target will auto-deploy and thus solve
the drift automatically. The new another target will however not auto-deploy but instead just show the drift between
the Git repository and the actual cluster state.
You can now click on the blue rocket again, after which it will deploy the current state.
Summing it up
The Kluctl Webui is a major milestone in the Kluctl ecosystem. It makes Kluctl a valid competitor in the GitOps space, especially when a UI is a big decision factor. It is also easy to start using it, as there is no need for a complex installation or maintenance.
What’s next?
The Kluctl Webui is still in an early stage. A lot of features will be added to it, including live visualisation of the cluster state, pod logs, simple control of application related resources (pod restart, deletion of resources, …).
Also, multi-cluster support will be properly implemented in the future. The Webui is already able to serve multiple
clusters (use multiple --context arguments in kluctl webui run), but without proper grouping/filtering abilities.
This will be improved in upcoming versions.
The Webui has basic OIDC support but misses RBAC style authorization. Future versions of the Webui will allow to properly authorize individuals/groups for specific deployments and actions.
I’m looking forward to the first users trying it out and giving feedback. I’m also happy to see people interested in contributions, especially in the space of HTML/CSS/React/…, as these are areas which I do not count as my main strength :)
Managing many Helm Charts with Kluctl
If you are a DevOps engineer, SRA, a Homelab enthusiast or in any other comparable role that needs to manage Kubernetes deployments, you’ll probably have made the same journey that many others have gone. You started with plain YAML manifests deployed via kubectl and eventually found out about Helm and Kustomize.
Whatever tool you decide to go for, the next realisation is usually that Helm and Kustomize itself need to be managed as
well. The naive solution is to create shell scripts that perform the required helm install and helm upgrade commands,
but these easily turn out to be unmanageable and quite limited.
There are multiple solutions available that allow you to manage your (and all third-party) Helm Charts and Kustomize deployments. Examples are Flux, Argo CD, Helmfile and Kluctl. This blog post will concentrate on Kluctl and at the end shortly compare it with the other options.
The final project that results from this post can be found in the kluctl-examples repository.
What to learn from this post?
I hope this post allows its readers to learn how easy it can be to manage multiple Helm Charts from one deployment project while leveraging the following features and advantages of Kluctl:
- Keep full control over deployment order (e.g. cert-manager after Cilium and apps after all base deployments)
- Organise your deployment project in a way that feels natural (a straightforward folder structure)
- Use the Kluctl CLI to diff and deploy and always be confident about the consequences of your deployment
What to deploy?
We will deploy two categories of deployments. The first category is a collection of “base” deployments, namely the following Helm Charts:
The second category contains “apps”, or the podinfo microservice to be specific. It should be easy to apply the same ideas you learn in this post in case you want to add more apps to the deployment.
The reason for this split is that it allows us to leverage Kluctl’s abilities to do dependency management and ordered deployments. It will also allow us to split up the project into multiple projects later (in a future blog post).
You might have noticed that we also deploy Cilium, which is usually unnecessary when deploying to a local cluster. I decided to still do this in this tutorial, as I believe that we can learn a lot from this, especially in regard to deployment order and dependency management (e.g., without a CNI, nothing else will work).
Setting up a local cluster
We’ll use kind for the local cluster. As we need to disable a few things (CNI and kube-proxy),
and also expose some ports (for ingress-nginx), let’s first create a proper kind configuration under ./kind-config.yaml:
# three node (two workers) cluster config
kind: Cluster
apiVersion: kind.x-k8s.io/v1alpha4
nodes:
  - role: control-plane
    # this is required for ingress-nginx to work
    kubeadmConfigPatches:
      - |
        kind: InitConfiguration
        nodeRegistration:
          kubeletExtraArgs:
            node-labels: "ingress-ready=true"
    extraPortMappings:
      - containerPort: 80
        hostPort: 8080
        listenAddress: 127.0.0.1
        protocol: TCP
      - containerPort: 443
        hostPort: 4443
        listenAddress: 127.0.0.1
        protocol: TCP
  - role: worker
  - role: worker
networking:
  # we use Cilium, so let's disable the default CNI
  disableDefaultCNI: true
  kubeProxyMode: none
Now let’s create the kind cluster:
$ kind create cluster --name kluctl-tutorial --config kind-config.yaml
Creating cluster "kluctl-tutorial" ...
 ✓ Ensuring node image (kindest/node:v1.25.3) 🖼
 ✓ Preparing nodes 📦 📦 📦
 ✓ Writing configuration 📜
 ✓ Starting control-plane 🕹️
 ✓ Installing StorageClass 💾
 ✓ Joining worker nodes 🚜
Set kubectl context to "kind-kluctl-tutorial"
You can now use your cluster with:

kubectl cluster-info --context kind-kluctl-tutorial

Thanks for using kind! 😊
If you check the PODs of the cluster now, you’ll see:
$ kubectl get pod -A
kube-system          coredns-565d847f94-hcf4m                                0/1     Pending   0          4m37s
kube-system          coredns-565d847f94-md625                                0/1     Pending   0          4m37s
kube-system          etcd-kluctl-tutorial-control-plane                      1/1     Running   0          4m51s
kube-system          kube-apiserver-kluctl-tutorial-control-plane            1/1     Running   0          4m50s
kube-system          kube-controller-manager-kluctl-tutorial-control-plane   1/1     Running   0          4m51s
kube-system          kube-scheduler-kluctl-tutorial-control-plane            1/1     Running   0          4m51s
local-path-storage   local-path-provisioner-684f458cdd-zl8xj                 0/1     Pending   0          4m37s
Please note that multiple PODs are in pending state, which is because there is no CNI deployed. We’ll fix this as the first step now.
Setting up the basic project structure
Let’s first create some basic project structure. A Kluctl deployment project starts with a root deployment.yaml which usually just includes more deployment projects and items.
A deployment item is a collection of Kubernetes manifests, either directly provided or generated from Kustomize or Helm.
Our root deployment yaml (./deployment.yaml) should look like this:
deployments:
  - include: base
This tells Kluctl that a sub-deployment should be included from the path ./base.
Now create ./base/deployment.yaml:
deployments:
  - path: cilium
This tells Kluctl that a deployment item at the location ./base/cilium should be deployed. The referenced folder
can contain plain manifests, a Kustomize deploymnet
or a reference to a Helm Chart and the necessary Helm Values.
In this case, it will be a Helm Chart.
Adding the first Helm Chart (Cilium)
A Helm based deployment item can be specified by putting a helm-chart.yaml file into the item’s directory. This means,
we have to add ./base/cilium/helm-chart.yaml with the following content:
helmChart:
  repo: https://helm.cilium.io/
  chartName: cilium
  chartVersion: 1.13.0
  skipPrePull: true
  releaseName: cilium
  namespace: "kube-system"
If you’re used to Helm already, you’ll probably recognise most of the parameters for the helmChart already. You
basically provide the repository URL, the chart name and version and some information about the release to be deployed.
The configuration/values for the Helm Release are passed via the helm-values.yaml file, which must be put along the
helm-chart.yaml, so it must be at ./base/cilium/helm-values.yaml. For our Cilium inside Kind example, these are good
values:
nodeinit:
  enabled: true
kubeProxyReplacement: strict
hostServices:
  enabled: false
externalIPs:
  enabled: true
nodePort:
  enabled: true
hostPort:
  enabled: true
bpf:
  masquerade: false
image:
  pullPolicy: IfNotPresent
ipam:
  mode: kubernetes

# See https://medium.com/@charled.breteche/kind-cluster-with-cilium-and-no-kube-proxy-c6f4d84b5a9d for details
k8sServiceHost: kluctl-tutorial-control-plane
k8sServicePort: 6443
The above values are loosely based on the Kind cluster with Cilium and no kube-proxy.
Let’s deploy it!
That’s all we need for a working and minimalistic Kluctl deployment. Let’s actually deploy it now (press y when asked!):
$ kluctl deploy
✓ Loading kluctl project
✓ Initializing k8s client
✓ Rendering templates
✓ Pulling Helm Chart cilium with version 1.13.0
✓ Rendering Helm Charts
✓ Building kustomize objects
✓ Postprocessing objects
⚠ No discriminator configured. Orphan object detection will not work
⚠ No discriminator configured for target, retrieval of remote objects will be slow.
✓ Getting 16 additional remote objects
✓ Getting namespaces
✓ cilium: Applied 16 objects.
✓ Running server-side apply for all objects

Warnings:
  no discriminator configured. Orphan object detection will not work

New objects:
  ClusterRole/cilium
  ClusterRole/cilium-operator
  ClusterRoleBinding/cilium
  ClusterRoleBinding/cilium-operator
  kube-system/ConfigMap/cilium-config
  kube-system/DaemonSet/cilium
  kube-system/DaemonSet/cilium-node-init
  kube-system/Deployment/cilium-operator
  kube-system/Role/cilium-config-agent
  kube-system/RoleBinding/cilium-config-agent
  kube-system/Secret/cilium-ca
  kube-system/Secret/hubble-ca-secret
  kube-system/Secret/hubble-server-certs
  kube-system/Service/hubble-peer
  kube-system/ServiceAccount/cilium
  kube-system/ServiceAccount/cilium-operator
? The diff succeeded, do you want to proceed? (y/N) y
✓ cilium: Applied 16 objects.
✓ Running server-side apply for all objects

New objects:
  ClusterRole/cilium
  ClusterRole/cilium-operator
  ClusterRoleBinding/cilium
  ClusterRoleBinding/cilium-operator
  kube-system/ConfigMap/cilium-config
  kube-system/DaemonSet/cilium
  kube-system/DaemonSet/cilium-node-init
  kube-system/Deployment/cilium-operator
  kube-system/Role/cilium-config-agent
  kube-system/RoleBinding/cilium-config-agent
  kube-system/Secret/cilium-ca
  kube-system/Secret/hubble-ca-secret
  kube-system/Secret/hubble-server-certs
  kube-system/Service/hubble-peer
  kube-system/ServiceAccount/cilium
  kube-system/ServiceAccount/cilium-operator
This should be pretty fast as it does not wait for readiness of Cilium. After a few seconds or minutes, you should see:
$ kubectl get pod -A
NAMESPACE            NAME                                                    READY   STATUS    RESTARTS   AGE
kube-system          cilium-g46vp                                            1/1     Running   0          2m11s
kube-system          cilium-n5ccg                                            1/1     Running   0          2m11s
kube-system          cilium-node-init-6gdcz                                  1/1     Running   0          2m11s
kube-system          cilium-node-init-8p6jj                                  1/1     Running   0          2m11s
kube-system          cilium-node-init-vswr8                                  1/1     Running   0          2m11s
kube-system          cilium-operator-74fc7f9d76-hc7fl                        1/1     Running   0          2m11s
kube-system          cilium-operator-74fc7f9d76-sdw9x                        1/1     Running   0          2m11s
kube-system          cilium-sqs26                                            1/1     Running   0          2m11s
kube-system          coredns-565d847f94-hcf4m                                1/1     Running   0          134m
kube-system          coredns-565d847f94-md625                                1/1     Running   0          134m
kube-system          etcd-kluctl-tutorial-control-plane                      1/1     Running   0          134m
kube-system          kube-apiserver-kluctl-tutorial-control-plane            1/1     Running   0          134m
kube-system          kube-controller-manager-kluctl-tutorial-control-plane   1/1     Running   0          134m
kube-system          kube-scheduler-kluctl-tutorial-control-plane            1/1     Running   0          134m
local-path-storage   local-path-provisioner-684f458cdd-zl8xj                 1/1     Running   0          134m
This shows us that the CNI has initialised properly and all PODs are running now.
A few words about deployment order
I assume it’s clear that whatever we’re going to add to the deployment project from now on, must be deployed AFTER Cilium got deployed. The reasons for this are simple: Nearly nothing can run without a CNI.
Deployment order is something that can be easily controlled in Kluctl deployment projects. By default, Kluctl deploys
all deployment items in parallel to get as much performance as possible. Consider the following example deployment.yaml:
deployments:
  - path: a
  - path: b
  - path: c
This example will cause a, b and c to be deployed in parallel. If you want b and c to be deployed after a
has been deployed, simply put a barrier
between a and b:
deployments:
  - path: a
  - barrier: true
  - path: b
  - path: c
This will cause Kluctl to stop and wait at the barrier and only continue when everything before (in this case just a)
got deployed. The same works with include and any other deployment item. We’ll leverage the barriers in the next
section.
Adding the cert-manager Helm Chart
Adding the cert-manager Helm Chart is basically the same as we’ve
seen with the Cilium Helm Chart. Open the ./base/deployment.yaml file and add a new deployment item:
deployments:
  - path: cilium
  - barrier: true
  - path: cert-manager
The barrier is important here, as noted in the previous section. It will ensure that all Cilium components are deployed before Kluctl continues with cert-manager.
Now, add ./base/cert-manager/helm-chart.yaml with the following content:
helmChart:
  repo: https://charts.jetstack.io
  chartName: cert-manager
  chartVersion: v1.11.0
  releaseName: cert-manager
  namespace: "kube-system"
  skipPrePull: true
cert-manager is a little special when it comes to installing the CRDs. It skips doing this by default and thus
requires the following ./base/cert-manager/helm-values.yaml:
installCRDs: true
Deploy it again
Now perform another deployment. You’ll notice that it will first show you what will change and then ask for
confirmation again. Press y when asked for confirmation:
$ kluctl deploy
✓ Loading kluctl project
✓ Initializing k8s client
✓ Rendering templates
✓ Pulling Helm Chart cilium with version 1.13.0
✓ Rendering Helm Charts
✓ Building kustomize objects
✓ Postprocessing objects
⚠ No discriminator configured. Orphan object detection will not work
⚠ No discriminator configured for target, retrieval of remote objects will be slow.
✓ Getting 67 additional remote objects
✓ Getting namespaces
✓ cilium: Applied 18 objects.
✓ Finished waiting
✓ cert-manager: Applied 49 objects. Applied 4 hooks.
✓ Running server-side apply for all objects

Warnings:
  no discriminator configured. Orphan object detection will not work

New objects:
  ClusterRole/cert-manager-cainjector
  ...snip...
  kube-system/ServiceAccount/cert-manager-webhook

Applied hooks:
  kube-system/ServiceAccount/cert-manager-startupapicheck
  kube-system/Role/cert-manager-startupapicheck:create-cert
  kube-system/RoleBinding/cert-manager-startupapicheck:create-cert
  kube-system/Job/cert-manager-startupapicheck
? The diff succeeded, do you want to proceed? (y/N) y
✓ cilium: Applied 18 objects.
✓ Finished waiting
✓ cert-manager: Applied 49 objects. Applied 4 hooks. Deleted 4 hooks.
✓ Running server-side apply for all objects

New objects:
  ClusterRole/cert-manager-cainjector
  ...snip...
  kube-system/ServiceAccount/cert-manager-webhook

Applied hooks:
  kube-system/ServiceAccount/cert-manager-startupapicheck
  kube-system/Role/cert-manager-startupapicheck:create-cert
  kube-system/RoleBinding/cert-manager-startupapicheck:create-cert
  kube-system/Job/cert-manager-startupapicheck
After a few seconds or minutes you should see cert-manager up and running in your cluster. We won’t further use cert-manager as it would be out of scope for this tutorial. I assume you can imagine how you would proceed with deployments that need to create cert-manager issuers and certificates (you’d use barriers and an appropriate project structure).
Add the ingress-nginx Helm Chart
Now let’s add the ingress-nginx Helm Chart. It’s important that you have used the kind configuration specified here, as otherwise the ingress controller won’t be accessible from your machine.
First, update ./base/deployment.yaml to include two new deployment items:
deployments:
  - path: namespaces
  - barrier: true
  - path: cilium
  - barrier: true
  - path: cert-manager
  - path: ingress-nginx
    waitReadiness: true
The first new deployment item is namespaces, which should contain a single file named ingress-nginx.yaml with the
following content:
apiVersion: v1
kind: Namespace
metadata:
  name: ingress-nginx
This deployment item and the barrier entry ensure that the required ingress-nginx namespace is created before we try
to deploy the ingress-nginx Helm Chart. This is a pattern that you’ll encounter in nearly all Kluctl based
deployments. It is also one of the best and easiest examples why ordering is important: You can’t deploy namespaced
objects before the target namespace is deployed.
Next, create the file ./base/ingress-nginx/helm-chart.yaml with the following content:
helmChart:
  repo: https://kubernetes.github.io/ingress-nginx
  chartName: ingress-nginx
  # Please don't try to manually upgrade this to the latest version yet. We will use this to demonstrate an upgrade later!
  chartVersion: 4.5.0
  skipPrePull: true
  releaseName: ingress-nginx
  namespace: ingress-nginx
For ./base/ingress-nginx/helm-values.yaml, you must use:
controller:
  hostNetwork: true
  service:
    type: ClusterIP
  nodeSelector:
    ingress-ready: "true"
  tolerations:
    - key: "node-role.kubernetes.io/control-plane"
      effect: "NoSchedule"
  updateStrategy:
    rollingUpdate:
      maxUnavailable: 1
    type: RollingUpdate
This configuration ensures that the ingress controller runs on the control-plane nodes and uses the host network of
these. The extraPortMappings of the kind configuration will then allow you to access
the ingress controller via localhost, or via http://my-ingress.127.0.0.1.nip.io:8080 (see https://nip.io).
The waitReadiness: true in the deployment.yaml means that Kluctl should not just deploy the resources of the
deployment item, but also wait for readiness of
each resource.
Deploy it again
Simply run kluctl deploy again and confirm it with y. You should see how Kluctl deploys all resources, runs
hooks and waits for readiness.
Add the podinfo application
We now have a somewhat functional cluster up and running locally. We can now also deploy the podinfo Helm Chart and expose it via ingress-nginx.
Let’s however first extend the project structure a bit. Edit the root deployment at ./deployment.yaml and change it to:
deployments:
  - include: base
  - barrier: true
  - include: apps
This will ensure that everything from base is deployed before it starts to deploy anything from apps. The apps
sub-deployment can now be used to deploy all kinds of apps, for example the podinfo
“microservice”.
Now create the file ./apps/deployment.yaml with the following content:
deployments:
  - path: podinfo
And ./apps/podinfo/helm-chart.yaml with the following content:
helmChart:
  repo: oci://ghcr.io/stefanprodan/charts/podinfo
  chartVersion: 6.3.4
  releaseName: podinfo
  namespace: "podinfo"
  skipPrePull: true
This time, we will create the necessary namespace in the same deployment item as the Helm Chart itself. This can be
accomplished by adding a ./apps/podinfo/kustomization.yaml with the following content:
resources:
  - namespace.yaml
  - helm-rendered.yaml
  - ingress.yaml
Kluctl will respect the order of resources found in Kustomize deployments, and thus deploy the namespace before anything else.
The helm-rendered.yaml is an auto-generated file containing the templated Helm Chart, this file however will never physically
appear in your project.
To add an ingress, add ./apps/podinfo/ingress.yaml (which is also specified in the kustomization.yaml) with the
following content:
apiVersion: networking.k8s.io/v1
kind: Ingress
metadata:
  name: podinfo
  namespace: podinfo
spec:
  ingressClassName: nginx
  rules:
    - host: podinfo.127.0.0.1.nip.io
      http:
        paths:
          - path: /
            pathType: Prefix
            backend:
              service:
                name: podinfo
                port:
                  number: 9898
The above ingress uses the previously deployed ingress-nginx controller with the class name nginx. We use
nip.io to get a simple dummy domain name for the ingress. This domain will resolve to 127.0.0.1 and
thus let you access the ingress through the extraPortMappings of the kind cluster.
Deploy podinfo
Now run kluctl deploy again and wait for it to finish. Also wait for all PODs to become ready in the cluster and then
try to access podinfo by opening http://podinfo.127.0.0.1.nip.io:8080/ in your browser.
You should be greeted by this sweet little fellow :)
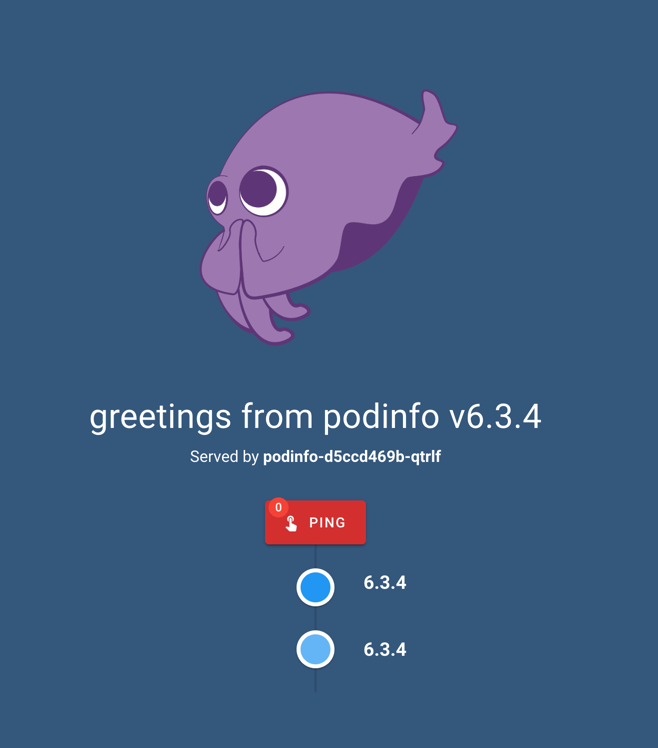
Tabula Rasa
Now let’s prove that the order of deployments was actually honored. Right now, you have added new stuff incrementally, so in theory the deployment could be in a state where it just worked by accident. We however want to make sure and prove that the whole deployment can be performed in one go.
Let’s delete the kind cluster, re-create it and then re-deploy:
$ kind delete cluster --name kluctl-tutorial
$ kind create cluster --name kluctl-tutorial --config kind-config.yaml
$ kluctl deploy
Things should be up and running again after a few minutes, without the need to retry the deployment.
Upgrade the ingress-nginx Helm Chart
If you look at ./base/ingress-nginx/helm-chart.yaml again, you’ll see that version 4.5.0 was used. This version is
already outdated and should be upgraded. Simply change the version to 4.5.2 and then run kluctl deploy again.
When you do this, Kluctl will first perform a dry-run and then print a diff that shows you what would happen if you confirm the deployment. The changes seen in the diff should look like this:
$ kluctl deploy
✓ Loading kluctl project
...snip...
✓ Running server-side apply for all objects

Warnings:
  no discriminator configured. Orphan object detection will not work

Changed objects:
  ClusterRole/ingress-nginx
  ...snip...
  ingress-nginx/ServiceAccount/ingress-nginx

Diff for object ClusterRole/ingress-nginx
+----------------------------------------------+----------------------+
| Path                                         | Diff                 |
+----------------------------------------------+----------------------+
| metadata.labels["app.kubernetes.io/version"] | -1.6.3               |
|                                              | +1.6.4               |
+----------------------------------------------+----------------------+
| metadata.labels["helm.sh/chart"]             | -ingress-nginx-4.5.0 |
|                                              | +ingress-nginx-4.5.2 |
+----------------------------------------------+----------------------+

Diff for object ClusterRoleBinding/ingress-nginx
+----------------------------------------------+----------------------+
| Path                                         | Diff                 |
+----------------------------------------------+----------------------+
| metadata.labels["app.kubernetes.io/version"] | -1.6.3               |
|                                              | +1.6.4               |
+----------------------------------------------+----------------------+
| metadata.labels["helm.sh/chart"]             | -ingress-nginx-4.5.0 |
|                                              | +ingress-nginx-4.5.2 |
+----------------------------------------------+----------------------+
...snip...

? The diff succeeded, do you want to proceed? (y/N)
If you confirm the deployment, it will apply the changes seen before.
Templating and Kluctl Targets
What you have seen so far is just showcasing how Kluctl deployment projects are structured and how Helm is integrated. This alone is already very powerful, as it allows you to structure large and complex deployments in a way that mirrors your intent, without too much complexity or boilerplate.
The next step would be to introduce templating and Kluctl targets. This will then allow you to make your deployment multi-environment and multi-cluster capable.
These topics will however require another post, as it would be too much to be covered in this post as well.
GitOps with Kluctl
This post has shown the “push” flow of Kluctl by simply calling Kluctl from your local machine. The same flow can be adapted to a pipeline based CI/CD system, e.g. Github Actions or Gitlab CI.
Kluctl also offers a pull based flow, implemented through the Kluctl controller. This is comparable to how Flux
does it, you deploy a KluctlDeployment custom resource and the controller handles reconciliation via periodic
deployments.
Kluctl vs Flux/ArgoCD/Helmfile
As mentioned at the top of this post, there are multiple solutions available that can all be used to tackle the same set of problems. All of these do it with different approaches and I will try to compare these approaches with the way Kluctl does it.
Flux
Flux allows to define Kustomizations and HelmReleases, which are both Kubernetes Custom Resources. These Custom Resources are then handled by different Flux Controllers which perform the actual reconciliation.
This in turn means that you make yourself dependent on the Custom Resources being applied on the cluster and the controller processing them. This also means, you can’t easily try out things locally, as the only available command to do this is flux diff kustomization which is much harder to use then kluctl diff and unable to handle Helm Charts.
You will also never be able to mix GitOps with non-GitOps flows, e.g. “deploy from your laptop” for development environments and GitOps for “real” environments. Being able to mix these flows would allow you to move extremely fast while testing out and researching new stuff, without the need to constantly push to Git and then wait for the reconciliation to succeed/fail.
Dependency management in Flux is handled via dependsOn fields, which can however not be mixed with different resource types.
ArgoCD
I’m not very experienced with ArgoCD, so take my words with a grain of salt. But from everything I’ve seen so far, the same things I wrote about Flux also apply to ArgoCD. The biggest difference is that you have a UI that visualises changes and drift.
Dependency management is handled via Sync Waves, which allows you to give resources a priority which is then used to determine deployment order.
Helmfile
Helmfile is probably the tool that can be best compared to Kluctl. There are however some important differences. Helmfile concentrates on Helm as being the underlying building block for all deployments. This means, it will internally convert plain manifests and Kustomize deployments into Helm Charts and install them via the Helm CLI.
Kluctl on the other hand uses Kustomize as the base building block and instead converts Helm Charts into Kustomize
deployments by simply rendering the Charts. This also means, that Kluctl will not use helm install but instead rely
on its own server-side-apply based implementation, giving it much better conflict detection, conflict resolution and
diffing capabilities.
Helmfile currently has no GitOps style controller available. From what I can find online, people tend to use
helmfile template to simply generate plain manifests which they then commit and push to Git.
What next?
The project that we created in this post is only partially useful, as it is not ready for multi-environment and multi-cluster deployments. In an upcoming post, I will describe how to add targets and use templating to allow different flavors to be deployed. I will also describe how to properly split up projects, for example so that you have a cluster-base deployment with Cilium and ingress-nginx and multiple application specific deployments.
Introducing the Template Controller and building GitOps Preview Environments
This blog post serves two purposes. The first one is to announce and present the Template Controller (Source). The second purpose is to demonstrate it by setting up a simple GitOps based Kubernetes deployment with dynamic preview environments.
The Template Controller
The template-controller is a Kubernetes controller that is able to create arbitrary objects based on dynamic templates
and arbitrary input objects. It is inspired by ArgoCD’s ApplicationSet,
which is able to create dynamic ArgoCD Applications
from a list of generators (e.g. Git) and an Application template.
The Template Controller uses a different approach, making it more flexible and independent of the GitOps system being used. It uses arbitrary Kubernetes objects as inputs and allows to create templated objects of any kind (e.g. a Flux Helm Release or a KluctlDeployment). This makes the controller very extensible, as any type of input can be implemented with the help of additional controllers which are not necessarily part of the project.
When specifying the input objects, you’d also specify which part of the object to use as input. This is done by
specifying a JSON Path that select the subfield of the object to use, e.g.
status.result for a GitProjector or
data for a ConfigMap.
The Template Controller implements this functionality through the ObjectTemplate
CRD. As the name implies, it also uses a templating engine, which is identical to the one used in
Kluctl, with the ObjectTemplate's input matrix available as
global variables.
Preparation
To try the examples provided in this blog post, you’ll need to have a running cluster ready. You could for example use a local kind cluster:
$ kind create cluster
Creating cluster "kind" ...
 ✓ Ensuring node image (kindest/node:v1.25.3) 🖼
 ✓ Preparing nodes 📦
 ✓ Writing configuration 📜
 ✓ Starting control-plane 🕹️
 ✓ Installing CNI 🔌
 ✓ Installing StorageClass 💾
Set kubectl context to "kind-kind"
You can now use your cluster with:

kubectl cluster-info --context kind-kind

Thanks for using kind! 😊
Then, you will need the Template Controller installed into this cluster:
$ helm repo add kluctl http://kluctl.github.io/charts
"kluctl" has been added to your repositories
$ helm install -n kluctl-system --create-namespace template-controller kluctl/template-controller
NAME: template-controller
LAST DEPLOYED: Wed Dec 28 17:24:47 2022
NAMESPACE: default
STATUS: deployed
REVISION: 1
You will also need the Flux Kluctl Controller installed for the examples. If you decide to use plain Flux deployments, you will need to install Flux instead.
$ # we assume that you have the Helm repository installed already
$ helm install -n kluctl-system --create-namespace flux-kluctl-controller kluctl/flux-kluctl-controller
NAME: flux-kluctl-controller
LAST DEPLOYED: Wed Dec 28 17:27:53 2022
NAMESPACE: default
STATUS: deployed
REVISION: 1
A few words on security
The Template Controller can access and create any kind of Kubernetes resource. This makes it very powerful but also
very dangerous. The Template Controller needs to run with a quite privileged service account but at the same time uses user
impersonation to downgrade permissions to less privileged service accounts while processing ObjectTemplates.
By default, the controller will use the default service account of the namespace that the ObjectTemplate is deployed
to. This will by default limit permissions to basically nothing, unless you explicitly bind roles to the default
service account. A better way is to create a dedicated service account instead and bind limited roles with the required
permissions to that dedicated service account. This service account can then be specified in the ObjectTemplate via
spec.serviceAccountName.
The following RBAC rules can be used when going through the examples in this blog post, it is however suggested to not
blindly reuse them in your real deployments. You should carefully asses which permissions are really needed and limit
the roles appropriately. Also pay attention when using the cluster-admin role or any other ClusterRole, as it easily
allows privilege escalation and at least allows to deploy into other namespaces than the ObjectTemplate's namespace.
apiVersion: v1
kind: ServiceAccount
metadata:
  name: template-controller
  namespace: default
---
kind: Role
apiVersion: rbac.authorization.k8s.io/v1
metadata:
  name: template-controller
  namespace: default
rules:
  - apiGroups: ["*"]
    resources: ["*"]
    verbs: ["*"]
---
kind: RoleBinding
apiVersion: rbac.authorization.k8s.io/v1
metadata:
  name: template-controller
roleRef:
  apiGroup: rbac.authorization.k8s.io
  kind: Role
  name: template-controller
subjects:
  - kind: ServiceAccount
    name: template-controller
    namespace: default
Dynamic Preview Environments
The initial use case and the main reason the Template Controller was created was to implement preview environments in a GitOps setup. Preview environments are dynamic environments that are spinned up and down on demand, for example when a pull request introduces changes that need to be tested before these are merged into the main branch.
In a GitOps-based setup, one would need to create the relevant custom resources per preview environment, for example a Flux Kustomization, Flux HelmRelease or a or KluctlDeployment. The underlying GitOps controller would then take over and perform the actual deployment.
In the following examples we will concentrate on using KluctlDeployments. Changing it to use Kustomizations or
HelmReleases should be self-explanatory, as the Template Controller treats all resource kinds equally.
There are multiple options on how to define the desired pre-conditions and configuration of a preview environment, which will be described in the next chapters.
Linking Preview Environments to Branches
You can, for example, link Git branches to preview environments, so that for each new branch a preview environment is
created, with configuration being read from a yaml file inside the branch. This can be achieved by using a
GitProjector, which will periodically
clone the configured Git repository, scan for matching branches and files and project the result into the GitProjector
status. The status is then available as matrix input inside the ObjectTemplate.
Example GitProjector:
apiVersion: templates.kluctl.io/v1alpha1
kind: GitProjector
metadata:
  name: preview
  namespace: default
spec:
  interval: 1m
  # You'll need to fork this repository and update the url to actually test what happens when you create new branches
  url: https://github.com/kluctl/kluctl-examples.git
  # In case you use a private repository:
  # secretRef:
  #   name: git-credentials
  ref:
    # let's only take preview- branches into account
    branch: preview-.*
The following ObjectTemplate can then use the GitProjetor's status.result field to create one KluctlDeployment
per branch.
apiVersion: templates.kluctl.io/v1alpha1
kind: ObjectTemplate
metadata:
  name: preview
  namespace: default
spec:
  # this is the service account described at the top
  serviceAccountName: template-controller
  prune: true
  matrix:
    - name: git
      object:
        ref:
          apiVersion: templates.kluctl.io/v1alpha1
          kind: GitProjector
          name: preview
        jsonPath: status.result
        # status.result is a list of matching branches. Without expandLists being true, the matrix input would treat
        # that list as a single input, but we actually want the list items being one input per item
        expandLists: true
  templates:
    - object:
        apiVersion: flux.kluctl.io/v1alpha1
        kind: KluctlDeployment
        metadata:
          # We can use the branch name as basis for the object name
          name: "{{ matrix.git.ref.branch | slugify }}"
          namespace: default
        spec:
          interval: 1m
          deployInterval: "never"
          timeout: 5m
          source:
            url: https://github.com/kluctl/kluctl-examples.git
            path: simple-helm
            ref:
              # ensure we deploy from the correct branch
              branch: "{{ matrix.git.ref.branch }}"
            # secretRef:
            #  name: git-credentials
          target: "simple-helm"
          context: default
          args:
            # Look into the simple-helm example to figure out what the environment arg does. It basically sets the
            # namespace to use, but could theoretically do much more.
            environment: "{{ matrix.git.ref.branch | slugify }}"
          prune: true
Please note the use of templating variables and filters inside the actual template under spec.templates. Each template
will be rendered once per matrix input, which in this case means once per branch. The templates can use the current
matrix input in the form of a variable, accessible via matrix.<name>, e.g. matrix.git in this case. Please read
the documentation of GitProjector to figure
out what is available in matrix.git, which is basically just a copy of the individual status.result list items.
One Preview Environment per pull requests
Another option is to use pull requests instead of the underlying Git branches to create preview environments. This might be useful if you want to report the status of your preview environment to the pull request, e.g. by updating the commit status when the deployment turns green or red. One might also want to post complex status comments, for example the result of the deployment in the form of structured and beautiful diff.
To achieve this, you can use the ListGithubPullRequests or the ListGitlabMergeRequests custom resource, which are also provided by the Template Controller.
Consider the following example:
apiVersion: templates.kluctl.io/v1alpha1
kind: ListGithubPullRequests
metadata:
  name: preview
  namespace: default
spec:
  interval: 1m
  owner: kluctl
  repo: kluctl-examples
  state: open
  base: main
  head: kluctl:preview-.*
  # in case you forked the repo into a private repo
  #tokenRef:
  #  secretName: git-credentials
  #  key: github-token
The above example will regularly (1m interval) query the GitHub API for pull requests inside the kluctl-examples
repository. It will filter for pull requests which are in the state “open” and are targeted against the “main” branch.
The result of the query is then stored in
the status.pullRequests field of the custom resource. The content of the pullRequests field basically matches what
GitHub would return via the Pulls API (with some fields omitted to
reduce the size).
You can now use the result in an ObjectTemplate:
apiVersion: templates.kluctl.io/v1alpha1
kind: ObjectTemplate
metadata:
  name: pr-preview
  namespace: default
spec:
  # this is the service account described at the top
  serviceAccountName: template-controller
  prune: true
  matrix:
    - name: pr
      object:
        ref:
          apiVersion: templates.kluctl.io/v1alpha1
          kind: ListGithubPullRequests
          name: preview
        jsonPath: status.pullRequests
        # status.result is a list of matching branches. Without expandLists being true, the matrix input would treat
        # that list as a single input, but we actually want the list items being one input per item
        expandLists: true
  templates:
    - object:
        apiVersion: flux.kluctl.io/v1alpha1
        kind: KluctlDeployment
        metadata:
          # We can use the head branch name as basis for the object name
          name: pr-{{ matrix.pr.head.ref | slugify }}
          namespace: default
        spec:
          interval: 1m
          deployInterval: "never"
          timeout: 5m
          source:
            url: https://github.com/kluctl/kluctl-examples.git
            path: simple-helm
            ref:
              # ensure we deploy from the correct branch
              branch: "{{ matrix.pr.head.ref }}"
            # secretRef:
            #  name: git-credentials
          target: "simple-helm"
          context: default
          args:
            # Look into the simple-helm example to figure out what the environment arg does. It basically sets the
            # namespace to use, but could theoretically do much more.
            environment: "pr-{{ matrix.pr.head.ref | slugify }}"
          prune: true
Using Flux instead of Kluctl
The above examples can easily be changed to work with Flux resources, e.g. Kustomization and HelmRelease. Simply
replace the template KluctlDeployment with the appropriate resources and use the same template variables where needed.
Shutting down preview environments
All the above examples will result in pruning the whole deployment when the branch gets deleted. This works because
after deletion of the branch, the GitProjector will not contain that branch in the status.result after the next
reconciliation. This will lead to the ObjectTemplate not having the matrix input anymore, causing a prune of the
KluctlDeployment object, which in turn causes deletion of all resources deployed by the Kluctl controller.
For the pull request based examples, it will also prune the deployments when the pull request gets closed or merged,
simply because the ListGithubPullRequests filters for open pull requests and thus will not list the pull
requests anymore after they have been closed/merged.
Another use case: Transformation of objects
The following is a very simple example of an ObjectTemplate that uses a Secret as input and simply transforms it
into another secret.
This can turn out to be quite useful if you need to re-use the same secret value multiple times but in different forms. For example, if you have a secret that stores database credentials, you might also need the same username and password inside a JDBC url. Typically, you’d have to store the secret twice in both required forms.
This is however not an option if the secret is generated after the deployment, e.g. by the Zalando Postgres operator
or by the AWS RDS operator. Using the Mittwald Secret Generator
is also something that I can recommend, as it removes the need to pre-generate secrets. With the ObjectTemplate based
transformation, the generated secrets can then be used in many new ways.
Consider the following input Secret:
apiVersion: v1
kind: Secret
type: Opaque
metadata:
  name: input-secret
  namespace: default
stringData:
  password: my-user
  username: secret-password
And the following ObjectTemplate:
apiVersion: templates.kluctl.io/v1alpha1
kind: ObjectTemplate
metadata:
  name: transformer-template
  namespace: default
spec:
  serviceAccountName: template-controller
  prune: true
  matrix:
    - name: secret
      object:
        ref:
          apiVersion: v1
          kind: Secret
          name: input-secret
  templates:
  - object:
      apiVersion: v1
      kind: Secret
      metadata:
        name: "transformed-secret"
      stringData:
        jdbc_url: "jdbc:postgresql://db-host:5432/db?user={{ matrix.secret.data.username | b64decode }}&password={{ matrix.secret.data.password | b64decode }}"
        # sometimes the key names inside a secret are not what another component requires, so we can simply use different names if we want
        username_with_different_key: "{{ matrix.secret.data.username | b64decode }}"
        password_with_different_key: "{{ matrix.secret.data.password | b64decode }}"
I hope the example above is self-explanatory. It simply transforms one secret into another, which is then in a form that can be consumed by a Java application for example that can only work with JDBC urls.
What’s next?
I believe that there are much more use cases for the Template Controller, and I’m absolutely convinced that the community will invent completely new ones and maybe share them by posting examples and ideas. Due to the flexible nature of the matrix inputs and template definition, a lot is possible. Think big! 😸
The Template Controller currently comes with a few additional custom resources
(e.g. GitProjector and ListGithubPullRequests) that are meant to be used as matrix inputs. I can imagine that
other custom resources might be candidates to be included in the controller as well, and I’m also open for ideas.
Templating in Kustomize with Kluctl style deploy and diff

Kustomize is currently one of the most used tools to organise Kubernetes manifests and the resulting deployments. As of the Kustomize website, “Kustomize introduces a template-free way to customize application configuration that simplifies the use of off-the-shelf applications.”
This says it very clear: Kustomize is template-free. The reasoning why Kustomize does not leverage templating and also will never do so is very reasonable and easy to understand. It tries to avoid the potential overload and complexity that comes with templating.
In my opinion however, the feared complexity is only a problem if one tries to suit the needs of everyone. This is an issue that popular Helm Charts do have for example. If you try to make everyone happy, your templates must make everything configurable, which eventually leads to Kubernetes manifests having more templating code than the actual YAML.
Kustomize in that regard, has the advantage that the re-used manifests do not have to take external customization into account. You, as the “customizer”, can decide what needs to be configurable and can achieve this with overlays and patches.
Looking at Kustomize from that perspective, it is of course very reasonable to keep it fully template-free. There is however also another perspective that you might want to consider.
What if I don’t care about the needs of others?
That sounds a bit selfish, doesn’t it? :) But let’s be honest to our self, many times you just need to create a deployment that suits your own needs right now. This deployment might re-use other components which it needs to customize, but it doesn’t need to be customized by someone else.
Thus, the level of customization that you need to implement is minimal. Maybe you just want to allow changing the target namespace or some replica count depending on the target environment. Maybe you want to have some components enabled in one environment and other components disabled in other environments. If you think more about it, you might also realise that it’s not about “customization” anymore but actually about “configuration”.
In that case, templating does not bring the risks that come with components that are meant to be re-used and customized.
This is because it is very clear what level of configuration is required and thus the use of templating can be reduced
to exactly that. In the end, you’ll only need a few places with something like {{ my_service.replicas }} and maybe some
conditional blocks with {% if my_service.enabled %}...{% endif %}.
On the other hand, using plain Kustomize to achieve the same result can easily become unnecessarily complex. For example, the use of bases, overlays and patches tends to create project structures that are hard to grasp when they grow. It can also force you to change your project structure in “unnatural” (at least that is how it feels for me) ways, because you have to adapt to the way overlays work. Templating would allow much simpler solutions in the above case.
But…Kustomize doesn’t support templating, right?
Bringing templating to Kustomize
Kluctl builds a large set of its features and promised advantages on top of
templating. The
Kustomize integration also allows templating in all
involved resources, including the kustomization.yaml itself and all referenced manifests.
Configuration can be provided in different ways:
- Via CLI arguments, e.g.
--argor--args-from-file. - Via Targets, meaning that you can define named targets with fixed args.
- Via vars in Kluctl deployments.
- Via Environment variables (through
KLUCTL_ARG_XXX).
In this blog post, we’ll focus on the first option for simplicity. The second and third options are much more powerful, but require more boilerplate to set up a Kluctl project and Kluctl deployments. The first option also works with plain Kustomize deployments, which is what I’m going to demonstrate.
Whatever option is used, all “args” are then available in every place by simply using
Jinja2 variable expressions, e.g. {{ args.my_arg }}.
A simple example
We will use the podtato-head project, specifically the Kustomize delivery scenario as an example . But first, we’ll need a test cluster. I suggest to simply use Kind and create a fresh cluster:
$ kind create cluster
Creating cluster "kind" ...
 ✓ Ensuring node image (kindest/node:v1.25.3) 🖼
 ✓ Preparing nodes 📦
 ✓ Writing configuration 📜
 ✓ Starting control-plane 🕹️
 ✓ Installing CNI 🔌
 ✓ Installing StorageClass 💾
Set kubectl context to "kind-kind"
You can now use your cluster with:

kubectl cluster-info --context kind-kind

Thanks for using kind! 😊
Ensure that you are on the correct Kubernetes context by calling kubectl config current-context and verify that it
points to kind-kind. Without using Kluctl Targets with
fixed contexts, Kluctl behaves the same as any other tool in the Kubernetes space when it comes to the current context,
meaning that you have to watch out to not deploy to prod by accident! :)
Then, clone the example project and enter the delivery directory:
$ git clone https://github.com/podtato-head/podtato-head.git
$ cd podtato-head/delivery/kustomize/base
$ ls -lah
total 120
drwxr-xr-x  17 user  wheel   544B Nov 16 16:28 .
drwxr-xr-x   6 user  wheel   192B Nov 16 16:28 ..
-rw-r--r--   1 user  wheel   558B Nov 16 16:28 configmap-discovery.yaml
-rw-r--r--   1 user  wheel   1.5K Nov 16 16:28 deployment-entry.yaml
-rw-r--r--   1 user  wheel   1.1K Nov 16 16:28 deployment-hat.yaml
-rw-r--r--   1 user  wheel   1.1K Nov 16 16:28 deployment-left-arm.yaml
-rw-r--r--   1 user  wheel   1.1K Nov 16 16:28 deployment-left-leg.yaml
-rw-r--r--   1 user  wheel   1.1K Nov 16 16:28 deployment-right-arm.yaml
-rw-r--r--   1 user  wheel   1.1K Nov 16 16:28 deployment-right-leg.yaml
-rw-r--r--   1 user  wheel   474B Nov 16 16:28 kustomization.yaml
-rw-r--r--   1 user  wheel   447B Nov 16 16:28 service-entry.yaml
-rw-r--r--   1 user  wheel   438B Nov 16 16:28 service-hat.yaml
-rw-r--r--   1 user  wheel   454B Nov 16 16:28 service-left-arm.yaml
-rw-r--r--   1 user  wheel   453B Nov 16 16:28 service-left-leg.yaml
-rw-r--r--   1 user  wheel   456B Nov 16 16:28 service-right-arm.yaml
-rw-r--r--   1 user  wheel   456B Nov 16 16:28 service-right-leg.yaml
-rw-r--r--   1 user  wheel   281B Nov 16 16:28 serviceaccount.yaml
As you can see, this is a simple Kustomize deployment, not using any bases or overlays. Let’s start using Kluctl by doing a vanilla deployment first:
$ kluctl deploy
✓ Loading kluctl project
✓ Initializing k8s client
✓ Rendering templates
✓ Rendering Helm Charts
✓ Building kustomize objects
✓ Postprocessing objects
✓ Getting namespaces
✓ .: Applied 14 objects.
✓ Running server-side apply for all objects

New objects:
  default/ConfigMap/podtato-head-service-discovery
  default/Deployment/podtato-head-entry
  default/Deployment/podtato-head-hat
  default/Deployment/podtato-head-left-arm
  default/Deployment/podtato-head-left-leg
  default/Deployment/podtato-head-right-arm
  default/Deployment/podtato-head-right-leg
  default/Service/podtato-head-entry
  default/Service/podtato-head-hat
  default/Service/podtato-head-left-arm
  default/Service/podtato-head-left-leg
  default/Service/podtato-head-right-arm
  default/Service/podtato-head-right-leg
  default/ServiceAccount/podtato-head
? The diff succeeded, do you want to proceed? (y/N) y
✓ .: Applied 14 objects.
✓ Running server-side apply for all objects

New objects:
  default/ConfigMap/podtato-head-service-discovery
  default/Deployment/podtato-head-entry
  default/Deployment/podtato-head-hat
  default/Deployment/podtato-head-left-arm
  default/Deployment/podtato-head-left-leg
  default/Deployment/podtato-head-right-arm
  default/Deployment/podtato-head-right-leg
  default/Service/podtato-head-entry
  default/Service/podtato-head-hat
  default/Service/podtato-head-left-arm
  default/Service/podtato-head-left-leg
  default/Service/podtato-head-right-arm
  default/Service/podtato-head-right-leg
  default/ServiceAccount/podtato-head
kluctl shows you the diff it will apply, asks for confirmation, applies the changes and then shows you the applied result. Verify that it got
deployed:
$ kubect get pod
NAME                                      READY   STATUS    RESTARTS   AGE
podtato-head-entry-7dfd8cdd6d-6mtxd       1/1     Running   0          95s
podtato-head-hat-6bcbf5f957-mfc6r         1/1     Running   0          95s
podtato-head-left-arm-7d9db78544-689tx    1/1     Running   0          95s
podtato-head-left-leg-59f45ffc4-grcjc     1/1     Running   0          95s
podtato-head-right-arm-5444b48b85-427w7   1/1     Running   0          95s
podtato-head-right-leg-f68df999f-g27nz    1/1     Running   0          95s
There are multiple things that you might have noticed already:
- Kustomize does not handle deployments, it just “builds” them and then let’s you handle the actual deployment via
kubectl apply -f. Kluctl also handles the actual deployment for you. The advantages of this will be clear in a few minutes. - Kluctl showed a diff (very simple one in this case, just new objects), then asked for confirmation and then showed what it did (identical to what the diff showed). The power of the diff feature will become much clearer in a few minutes.
Introducing some templating
Now let’s introduce some templating into the example deployment. For example, let’s edit deployment-entry.yaml and
change the replicas field to:
apiVersion: apps/v1
kind: Deployment
metadata:
  name: podtato-head-entry
...
spec:
  replicas: {{ args.entry_replicas }}
...
If you’d try to re-deploy this now, it will throw an error about args.entry_replicas being undefined. So let’s call
Kluctl with the now required arg:
$ kluctl deploy -a entry_replicas=3
...

Changed objects:
  default/Deployment/podtato-head-entry

Diff for object default/Deployment/podtato-head-entry
+---------------+--------------------------------------------------------------+
| Path          | Diff                                                         |
+---------------+--------------------------------------------------------------+
| spec.replicas | -1                                                           |
|               | +3                                                           |
+---------------+--------------------------------------------------------------+
? The diff succeeded, do you want to proceed? (y/N)
You’ll notice that Kluctl again stops and asks for confirmation. But this time, it will actually show you some meaningful diff. It allows you to verify that Kluctl will apply the intended changes. The diff that you see is NOT a simple file based diff, but a diff after performing a full-blown server-side apply in dry-run mode. This means, what you see is what you’ll get, no surprises in-between!
Let’s confirm with y:
? The diff succeeded, do you want to proceed? (y/N) y
✓ .: Applied 14 objects.
✓ Running server-side apply for all objects

Changed objects:
  default/Deployment/podtato-head-entry

Diff for object default/Deployment/podtato-head-entry
+---------------+--------------------------------------------------------------+
| Path          | Diff                                                         |
+---------------+--------------------------------------------------------------+
| spec.replicas | -1                                                           |
|               | +3                                                           |
+---------------+--------------------------------------------------------------+
The actual deployment is performed and the result printed to the user. The result should always be identical to the diff you saw before.
Let’s make something conditional
Now let’s make the “hat” of the podtate-head optional. However, as you have previously deployed the project already, you’ll need to delete the hat deployment manually:
$ kubectl delete deployment.apps/podtato-head-hat service/podtato-head-hat
Edit kustomization.yaml and put an if/endif around the hat resource:
...
resources:
- configmap-discovery.yaml
{% if args.hat_enabled | default(true) %}
- deployment-hat.yaml
- service-hat.yaml # also remove the original entry from the bottom of the file
{% endif %}
- deployment-left-arm.yaml
...
You can now deploy with Kluctl while having the hat disabled:
$ kluctl deploy -a entry_replicas=3 -a hat_enabled=false
If you deploy with a hat and then with hat_enabled=false, Kluctl will not delete/prune the previously deployed hat.
If you want to have pruning support, you must create a Kluctl deployment
with commonLabels enabled, so that Kluctl knows how to identify related objects.
Using vars files instead of arguments
args can also be passed via vars files, which are arbitrary structured YAML files. This is a comparable to helm value
files. Consider the following examples.
test-args.yaml:
entry_replicas: 2
hat_enabled: false
prod-args.yaml:
entry_replicas: 3
These values can be used with --args-from-file:
$ kluctl diff --args-from-file=test-args.yaml
$ kluctl diff --args-from-file=prod-args.yaml
Based on that, you can easily implement multi-environment deployments. This is however still a poor-mans solution to
multi-environment deployments, with the use of Kluctl projects
being the better solution. Said Kluctl projects allow you to define named targets
which are fixed in their configuration, so that you only have to invoke kluctl deploy -t test without needing to
know what the internal details are.
What’s next?
This article has shown how Kluctl can be used on simple/plain Kustomize deployments. The next thing you should consider is using Kluctl projects and Kluctl deployments around your Kustomize deployments. It will allow you to have much more flexible and powerful ways of configuration management. It will also allow you to use the GitOps style flux-kluctl-controller.
Upcoming blog posts will show why the Helm Integration is a good thing with many advantages and also describe why one would choose Kluctl over plain Helm.
Multiple Environments with Flux and Kluctl
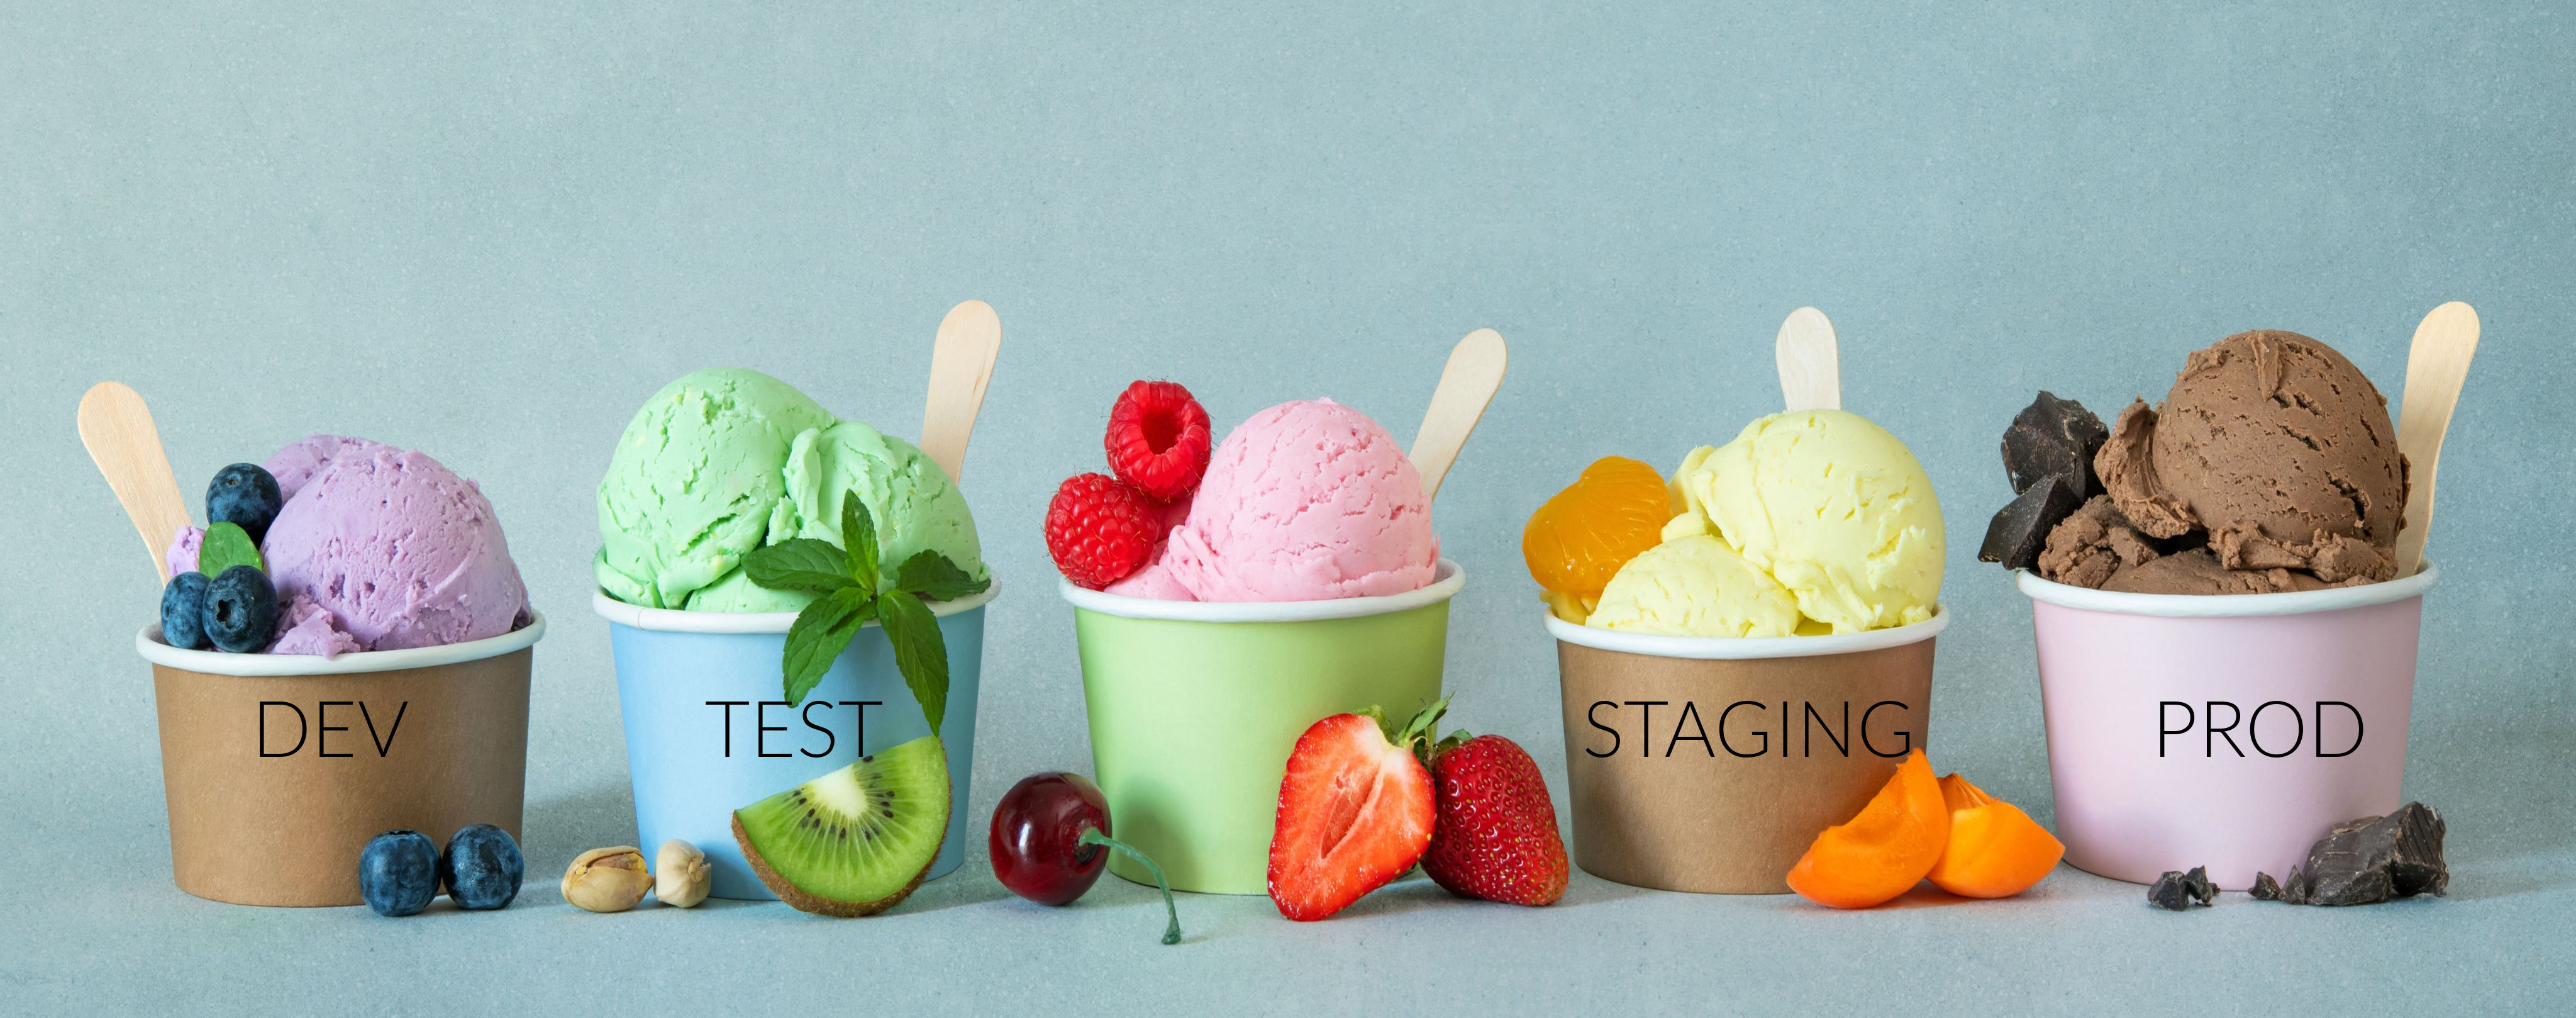
Most projects that have server-side components usually need to be deployed multiple times, at least if you don’t want to break things for your users all the time. This means, that there is not only one single “prod” environment, but also something like “test” or “staging” environments. So usually, there is a minimum of two different environments.
Each of these environments has a defined role to play. The “prod” environment is obviously the environment that is used in production. A “test” or “staging” environment is usually the one where new versions are deployed so that they can be tested before being promoted to “prod”. A “dev” environment might be the one where even high-risk deployments are allowed where breaking everything is daily business. You could even have multiple dev environments, e.g. one per developer.
In the Kubernetes world, it is perfectly viable and good practice to run multiple environments on a single cluster. Depending on the requirements of your project, you might want to separate prod from non-prod environments, but you could still have “prod” and “staging” on the same cluster while “test”, “dev”, “uat” exist on a non-prod cluster.
Environment Parity
If you want to make this work in a way that does not cause too much pain, you must practice environment parity as much as possible. The best way to achieve this is to have full automation and everything as code. The same “code” that was used to deploy “prod” should also be used to deploy “staging”, “test” and all other environments. The only difference in the deployments should be a defined set of configurations.
Such configurations can for example be the target cluster and/or namespace, the resource allocations (e.g. 1 replica in “dev”, 3 replicas in “prod”), external systems (e.g. databases) and ingress configuration (e.g. DNS and certificates). Configuration can also enable/disable conditional parts of the deployment, for example to disable advanced monitoring on “dev” environments and enable mocking services as replacements for real external systems.
Tooling
There are multiple tools available that allow you to implement a multi-env/multi-cluster deployment that is completely automated and completely “as code”. Helm and Kustomize are currently the first tools that will pop up when you try to look for such tools. As written in my previous blog post, I believe that these tools are the best option for the things that they do very good, but a sub-optimal choice when it comes to configuration management.
Kluctl is the preferred solution for me right now. Not only because I built it, but also because so far I did not find a solution that is as easy to learn and use and so flexible at the same time.
Fully working multi-env example
I suggest to open the microservices demo in another tab and look into it at least briefly (especially the third part). I will from now on pick stuff from this tutorial as examples in this blog post.
Targets in Kluctl
Kluctl works with the concept of “targets”. A target is a named configuration that acts as the entry point for every further configuration required for your environment. As an example, look at the targets from .kluctl.yaml of the microservices demo:
targets:
  - name: local
    context: kind-kind
    args:
      env_type: local
  - name: test
    context: kind-kind
    args:
      env_type: real
  - name: prod
    context: kind-kind
    args:
      env_type: real
Based on these, the same deployment can be configured differently depending on the target, or actually the args
passed via the target. In the microservices demo, env_type (name can be chosen by you) is used to include further
configuration inside the deployment.yaml:
...
vars:
  - file: ./vars/{{ args.env_type }}.yml
...
At the same time, Kluctl makes the target configuration itself available to the deployment, making things like this possible:
apiVersion: v1
kind: Namespace
metadata:
  name: ms-demo-{{ target.name }}
You can also conditionally enable/disable parts of your deployment depending on the configuration loaded via the vars
block above:
deployments:
  - path: adservice
  - path: cartservice
  - path: checkoutservice
  - path: currencyservice
  {% if services.emailservice.enabled %}
  - path: emailservice
  {% endif %}
  - path: frontend
  {% if services.loadgenerator.enabled %}
  - path: loadgenerator
  {% endif %}
  - path: paymentservice
  - path: productcatalogservice
  - path: recommendationservice
  - path: shippingservice
I hope the above snippets give you a feeling about how multi-env deplyoments can be solved via Kluctl. As already mentioned, I suggest to read through the microservices demo tutorial to get an even better understanding. The first two parts will describe some Kluctl basics while the third part enters multi-env deployments.
GitOps and Flux
Kluctl is designed in a way that allows seamless co-existence of CLI based workflows, classical CI/CD and GitOps. This means, that even if you decide to perform prod deployments only via GitOps, you can still perform exactly the same deployment to other environments through your CLI. All this without any struggle (you really only need access to the cluster) and 100% compatible to how the same deployment would be performed via GitOps or CI/CD.
This allows you to adapt your workflow depending on what your current goal is. For example, a developer testing out risky and bleeding-edge changes in his personal dev environment can deploy from his local machine, avoiding the painful “modify -> push -> wait -> error -> repeat” cycles seen too often in pure GitOps and CI/CD setups. When the developer is done with the changes, GitOps can take over on the another (e.g. “test” and later “prod”) environment.
Even for “prod”, which in the above scenario is GitOps managed, can benefit from the possibility to run Kluctl from your local machine. Running a “kluctl diff -t prod” before promoting to “prod” can prevent some scary surprises.
Kluctl implements GitOps via the flux-kluctl-controller.
It allows to create KluctlDeployment objects which refer to your Kluctl
project (which relies in Git) and the target to be deployed.
Installing flux-kluctl-controller
Before being able to create KluctlDeployment objects, the
flux-kluctl-controller needs to be installed first. Please navigate to the
installation documentation
and follow the instructions found there.
Microservices Demo and Flux
Deploying the microservices demo via Flux is quite easy. First, we’ll need a
GitRepository object that refers to the Kluctl project:
apiVersion: source.toolkit.fluxcd.io/v1beta1
kind: GitRepository
metadata:
  name: microservices-demo
spec:
  interval: 1m
  url: https://github.com/kluctl/kluctl-examples.git
  ref:
    branch: main
This will cause Flux to pull the source whenever it changes. A KluctlDeployment
can then refer to the GitRepository:
apiVersion: flux.kluctl.io/v1alpha1
kind: KluctlDeployment
metadata:
  name: microservices-demo-test
spec:
  interval: 5m
  path: "./microservices-demo/3-templating-and-multi-env/"
  sourceRef:
    kind: GitRepository
    name: microservices-demo
  timeout: 2m
  target: test
  prune: true
  # kluctl targets specify the expected context name, which does not necessarily match the context name
  # found while it is deployed via the controller. This means we must pass a kubeconfig to kluctl that has the
  # context renamed to the one that it expects.
  renameContexts:
    - oldContext: default
      newContext: kind-kind
The above example will cause the controller to deploy the “test” target/environment to the same cluster where the
controller runs on. The same deployment can also be deployed to “prod” with a slightly different KluctlDeployment:
apiVersion: flux.kluctl.io/v1alpha1
kind: KluctlDeployment
metadata:
  name: microservices-demo-prod
spec:
  interval: 5m
  path: "./microservices-demo/3-templating-and-multi-env/"
  sourceRef:
    kind: GitRepository
    name: microservices-demo
  timeout: 2m
  target: prod
  prune: true
  # kluctl targets specify the expected context name, which does not necessarily match the context name
  # found while it is deployed via the controller. This means we must pass a kubeconfig to kluctl that has the
  # context renamed to the one that it expects.
  renameContexts:
    - oldContext: default
      newContext: kind-kind
Multiple Clusters
To make things easy for now, the above examples stick with a single cluster. The microservices demo project is
deploying all targets to different namespaces already, so this is enough to showcase the Flux support. To make it work
with multiple clusters, simply install the controller on another cluster and create the appropriate KluctlDeployment
objects per cluster.
As an alternative, you can have a central Flux (+flux-kluctl-controller) installation that deploys to multiple clusters.
This can be achieved with the help of the spec.kubeconfig and spec.serviceAccountName
field of the KluctlDeployment object.
Also, as the examples stem from the microservices demo, they
use the kind-kind context names. In a more realistic setup, you would use the real cluster/context names here. This
also assumes that all developers will then use the same context names to refer to the same clusters. If this is honored,
you gain 100% compatibility between the GitOps based deployments and CLI based deployments.
What’s next?
The flux-kluctl-controller and Kluctl itself already support dynamic feature/review environments, meaning that the controller can create new targets/deployments dynamically. The next blog article will go into the details of these feature/review environments.
Rethinking Kubernetes Configuration Management
One of the big advantages of Kubernetes is its declarative nature when it comes to deployed resources. You define what state you expect, apply it to Kubernetes and then let it figure out how to get to that state.
At first, this sounds like a big win, which it actually is. It however doesn’t take long for beginners to realize that simply writing yamls and applying them via “kubectl apply” is not enough.
The beginner will realize pretty early that configuration between different manifests must be synchronized, e.g. a port defined in a Service must match the port used when accessing the service from another Deployment. Hardcoding these configuration values will work till some degree, but get messy when your deployment projects get larger.
It will get completely unmanageable when the same resources need to get deployed multiple times, e.g. for multiple environments (local, test, uat, prod, …) and/or clusters. Copying and modifying all resources is probably the worst solution one could come up with at this stage.
A poor-man’s solution that works a little bit better is to introduce glue bash code, that performs substitutions and decides which manifests to actually apply. As with most bash scripting, this tends to start with “just a few lines” and ends up with unmaintainable spaghetti code.
Spoiler: This blog post is meant to introduce and promote Kluctl, which is a new tool and approach to configuration management in Kubernetes. Skip the next sections about existing tools if you don’t want to read about stuff you probably already know well enough.
Multiple tools to the rescue
Luckily, there are multiple solutions available that try to solve the described situation from above. Each of these tools has a different approach with its pros and cons. Many of the pros/cons are a matter of personal preference, e.g. text based templating is preferred by some and avoided by others.
Based on the last sentence, I’ll try to list a few tools that I know of and what my personal opinion/preference/experience with these is.
Kustomize
Kustomize advertises itself as a “template-free” solution for configuration management. Instead of templating, it relies on “bases and overlays” for composition and configuration of different environments.
Overlays include bases while performing some basic modifications to these (e.g. add a name prefix). More complex modifications to bases require the use of strategic or json6902 patches.
This approach usually starts clean and is easy to understand and maintain in the beginning. It can however easily get complicated and messy due to the unnatural project structure. It can become hard to follow the manifests and how/where modifications/patches got introduced.
The biggest pro point for Kustomize is its ease of use and the flat learning curve. There is nearly no need to learn anything new, as everything is plain YAML and looks very familiar if you already know how to write and read Kubernetes manifests. Kustomize also offers some very convenient tools, like secret and configmap generators. Kustomize is also integrated into kubectl and thus does not need any extra installation.
An interesting and revealing observation I made is that even though Kustomize does not offer templating on its own, other tools that leverage Kustomize (e.g. Flux or ArgoCD) offer features like substitutions to fulfill a recurring need of their users, loosening the “template-free” nature of Kustomize and signaling a clear demand for templating with Kustomize.
Helm
The first thing you see on helm.sh is: “The package manager for Kubernetes”. This already reveals what it’s very good for: Package management. If you want to pick a ready-to-use, pre-packaged and well-configurable application from a huge library of “Charts”, simply go to hub.helm.sh and look for what you need.
Installation is as simple as two command line calls, “helm repo add …” and “helm install …”. Other commands then allow you to manage the installation, e.g. upgrade or delete it.
What it’s not good at is composition and configuration management for your infrastructure and applications. Helm Charts require quite some boilerplate templating if you want to get to the flexibility that is offered by many of the publicly available charts. At the same time, you usually don’t need that flexibility and end up with templates that only have very few configuration options.
If you still decide to use Helm for composition and configuration management, you might end up with all the overhead of Helm without any of the advantages of it. For example, you would have to provide and maintain a Helm repository and actually perform releases into it, even if such release management doesn’t make sense for you.
Composition of Helm Charts requires the use of “Umbrella Charts”. These are charts that don’t by itself define resources but instead refer to multiple dependent charts. Configuration of these sub-charts is passed down from the umbrella chart. The umbrella chart, as all other charts, will also require you to perform release management and maintenance of a repository.
In my personal opinion, umbrella charts do not feel “natural”. It feels like a solution that only exists because it is technically possible to do it this way.
Helm and Kustomize can not be used together without some outer glue, e.g. scripting or special tooling. Many solutions that glue together Helm and Kustomize will however lose some crucial Helm features in-between, e.g. Helm Hooks and release management.
Using both tools in combination can still be very powerful. For example, it allows you to customize existing public Helm Charts in ways not offered by the chart maintainers. For example, if a chart does not offer configuration to add nodeSelectors, you could use a Kustomize patch to add the desired modifications to the resources in question.
(Kustomize has some experimental Helm integration, but the Kustomize developers strongly discourage use of it in production).
Flux CD
Flux allows you to implement GitOps style continuous delivery of your infrastructure and applications. It internally heavily relies on Kustomize and Helm to provide the actual resources.
Flux can also be used for composition and configuration management. It is for example possible to have a single Kustomization deployment that actually glues together multiple other Kustomizations and HelmReleases.
Flux also “enhances” Kustomize and Helm by allowing different kinds of preprocessing operations, e.g. substitutions for Kustomize and patches for Helm Charts. These enhancements are what make configuration management much easier with Flux.
The biggest advantage of Flux (and GitOps in general) is however also one of its biggest disadvantages, at least in my humble opinion. You become completely dependent on the Flux infrastructure, even for testing of simple changes to your deployments. I assume every DevOps engineer knows the pain of recurring “modify -> push -> wait -> error -> repeat” cycles. Such trial and error sessions can become quite time-consuming and frustrating.
It would be much easier to test out your changes locally (e.g. via kind or minikube) and push to Git only when you feel confident enough that your changes are ready. This is not easily possible to do in a reliable way with Flux based configuration management. Even a dedicated environment/playground stays painful as it does not remove the described cycle.
Plain Kustomize and Helm would allow you to run the tools from your local machine, targeted against a local cluster or remote playground environment, but this would require you to replicate some of the features offered by Flux so that your testing stays compatible with what is later deployed via Flux.
Argo CD
Argo CD is another GitOps implementation that is similar to Flux. The most visible difference is that it also offers some very good UI to visualize your deployments and the state of these. I do not have enough experience with ArgoCD to go into detail, but I assume that many of the things I wrote about Flux also apply for ArgoCD.
Rethinking Kubernetes Configuration Management
I propose to rethink how the available tooling is used in daily business. Basically, I suggest that the previously described tools keep doing the parts that they are best at and introduce new tooling to solve the configuration management problem.
Basically, we need a tool that acts as “glue” between Kustomize, Helm and GitOps. Something that allows to perform declarative composition of self-written and third-party Kustomize deployments, third-party Helm Charts and a powerful but easy to learn mechanism surrounding it to synchronize configuration between all components.
It would get even better if a unified CLI would manage all deployments the exact same way, no matter how large or complex. A CLI that does not interfere with GitOps style continues delivery and allows friendly co-existence.
Introducing Kluctl
My proposed solution for all this is Kluctl. It’s “the missing glue” (hence the name, glue with k and without e). Kluctl was born out of the need to create a unified solution that removes the need for all other glue around Kubernetes deployments. Development of it happened based on large real-life production environments inside a corporate environment with practicability being one of the highest priorities.
It provides a powerful but easy to learn project structure and templating system that feels natural when used daily. The project structure follows a simple inclusion hierarchy and gives you full freedom on how to organize your project.
The templating engine allows you to load configuration from multiple sources (usually arbitrary structured yaml files) and use the configuration in all components of your project.
The project is then deployed to “targets”, which can represent an environment and/or cluster. Multiple targets can exist on the same cluster or on different clusters, it’s all up to you. The “target” acts as the entry point for your configuration, which then implicitly defines what a target means.
The Kluctl CLI allows to diff, deploy, prune and delete targets, all via a unified CLI. If you remember how to do a “deploy”, you will easily figure out how to diff or prune a target. If you remember how to do it for project X, you will also know how to do it for project Y. It’s always the same from the CLI perspective, no matter how simple or complex a deployment actually is.
Kluctl will perform a dry-run and show a diff before a deployment is actually performed. Only if you agree with what would be changed, the changes are actually applied. After the deployment, Kluctl will show another diff that visualizes what has been changed.
This means, you always know what will happen and what has happened. It allows you to trust your deployments, even if you somehow lost track about the state of a target environment.
In addition, Kluctl works according to the premise: Everything can, nothing must. That’s why it works equally well for small and large deployment projects compared to the overhead some other tools impose.
Flux integration is possible via the flux-kluctl-controller and allows friendly co-existence of classical DevOps and GitOps. This means you can deploy to a playground environment from your local machine and let GitOps handle all other deployments, adhering to the GitOps principles.
Learning Kluctl
If you want to learn about Kluctl, go to kluctl.io and read the documentation. Best is actually to start with the Microservices Demo Tutorial, as it tries to introduce you to the Kluctl concepts step by step.
After you’ve finished the tutorial, you should be able to understand how projects are structured, how Kustomize and Helm is integrated and how targets are used to implement multi-env and multi-cluster deployments.
Based on that, you should be able to imagine how Kluctl could play a role in your own projects and maybe you decide to give it a try.
More tutorials, documentation and blog posts will follow soon.
Kluctl and Flux
We’re very happy to announce that Kluctl can from now on be used together with Flux. This will allow you to combine the workflows and features advertised by Kluctl with GitOps style continuous delivery.
GitOps vs Kluctl
One of the first questions that we usually get when introducing Kluctl to someone is something like: “Why not GitOps?” or “Why not Flux?”. There seems to be a common misunderstanding that arises in many people when trying to understand Kluctl on first sight, which is to believe that Kluctl is an alternative or competitor to GitOps and Flux (or even ArgoCD).
This is not the case. If one wants to compare Kluctl with something else, then it’s more appropriate to compare it to Helm, Kustomize or Helmfile. It should be clear that Kustomize for example is not an alternative/competitor for Flux, but instead an essential tool and building block to make it work.
Kluctl can be looked at from the same perspective when it comes to Flux. Flux implements Helm and Kustomize support via different controllers, namely the kustomize-controller and the helm-controller. With Kluctl, the same style of controller can be implemented and integrated into the Flux ecosystem.
Introducing the Kluctl Flux Controller
An alpha version of the Kluctl Flux Controller has just been released. It allows to create KluctlDeployment objects which are reconciled in a similar fashion as Kustomizations.
Each KluctlDeployment specifies a source object (e.g. a GitRepository), the target to be deployed and some information on how to handle kubeconfigs. The controller then regularly reconciles the deployment, meaning that it will invoke kluctl deploy whenever a change is detected in the deployment.
Sounds great? Then take a look at this very simple example
Kustomize/Helm vs Kluctl
If you’ve already read through the Kluctl documentation, you’ve probably noticed that Kluctl internally uses Kustomize and Helm extensively.
This might raise the question: Why not use plain Kustomize and/or Helm if Flux is already involved? Good question!. Lets take a look:
Kluctl Projects/Deployments
If you prefer the way Kluctl organizes and structures projects and deployments, then using the Flux Kluctl Controller is obviously the best choice. Kluctl allows you to easily glue together what belongs together. If for example, a redis database is required to make your application work, you can manage the redis Helm Release and your application in the same deployment, including the necessary configuration to let them talk to each other.
To see how different a Kluctl deployment is compared to classic Kustomize/Helm + Flux, you can compare the flux2-kustomize-helm-example and the Kluctl Microservices Demo (here is tutorial for the demo).
Native multi-env support
Kluctl allows you to natively create deployment projects that can be deployed multiple times to different
environments/targets. You can for example have one target that is solely meant for local (e.g. Kind based) deployments,
one that targets the test environment and one for prod. You can then use templating to influence deployments in whatever
way you like. For example, you could change the local target to set all replicas to 1 and skip resource hungry
support applications (e.g. monitoring infrastructure).
This is possible in plain Kustomize as well, but requires you to solve it without the concept of targets and without templating. In Kustomize, multi-env deployments must be solved with overlays, which does not necessary align with how you prefer your project structure.
Mix DevOps and GitOps
The core idea of GitOps is that Git becomes the single source of truth for the desired cluster state. This is something that is extremely valuable with many advantages compared to other approaches. There are however still situations where diverging from GitOps is very valuable as well.
For example, when you start a new deployment project, you’re usually in a state of frequent changes inside the deployment project. These frequent changes need frequent deployments and testing until you get to a point where things are stable enough. If you’re forced to adhere to GitOps in that situation, you end up with very noisy Git histories and plenty of trial-and-error deployment cycles. This is a major productivity killer and we believe there has to be a better way.
With Kluctl, you can start developing locally and deploying from your local machine, with the guarantee that what you see is what will also happen later when GitOps is introduced for the same deployment. When you’re ready, push to Git, create the appropriate KluctlDeployment resource and let GitOps/Flux do its magic.
You can also use dedicated targets for development purposes and only deploy to them from your local machine, while other targets are deployed via GitOps/Flux.
See it in action
If you want to see the Flux Kluctl Controller in action, check out template-cluster-k3s-kluctl, which is a fork of k8s@home template-cluster-k3s with all HelmReleases and Kustomizations ported to KluctlDeployments.
What now?
More documentation, guides, tutorials and examples will follow in the next few days and weeks.